How to Fix Creaky Floorboards: Find the Squeak and Stop It
Quick answer: To fix a creaky floorboard, first find out what moves when you step on it. If two finished wood boards rub together, a small amount of flooring-safe dry lubricant may quiet them. If the subfloor moves against a joist, secure the connection with an appropriate screw or carefully fitted shim. Repairs are easiest from an unfinished basement or crawl space. For carpeted floors, a purpose-made breakaway-screw kit may help without lifting the carpet. Don’t drill into a floor until you know its construction and what’s beneath it.
An occasional creak is part of life in many houses, especially those with older wood floors. A loud squeak in the same spot every time you walk past, though, can get old quickly.
Fortunately, you often don’t need to replace the flooring. Most squeaks come from small movements between boards, fasteners, subfloor panels, or framing. The useful question isn’t simply where is the noise? It’s which parts are rubbing or shifting?
This guide walks through the diagnosis and the most practical fixes for exposed hardwood, wood subfloors, and carpeted floors. It also explains when a repair kit, adhesive, or a contractor makes more sense than another screw.
Why Do Floorboards Creak?
A squeak usually occurs when one component moves against another under your weight. Possible contact points include:
- Board against board: Adjacent wood planks rub at their edges or tongue-and-groove joints.
- Board against fastener: A slightly loose nail or flooring cleat rubs as the plank flexes.
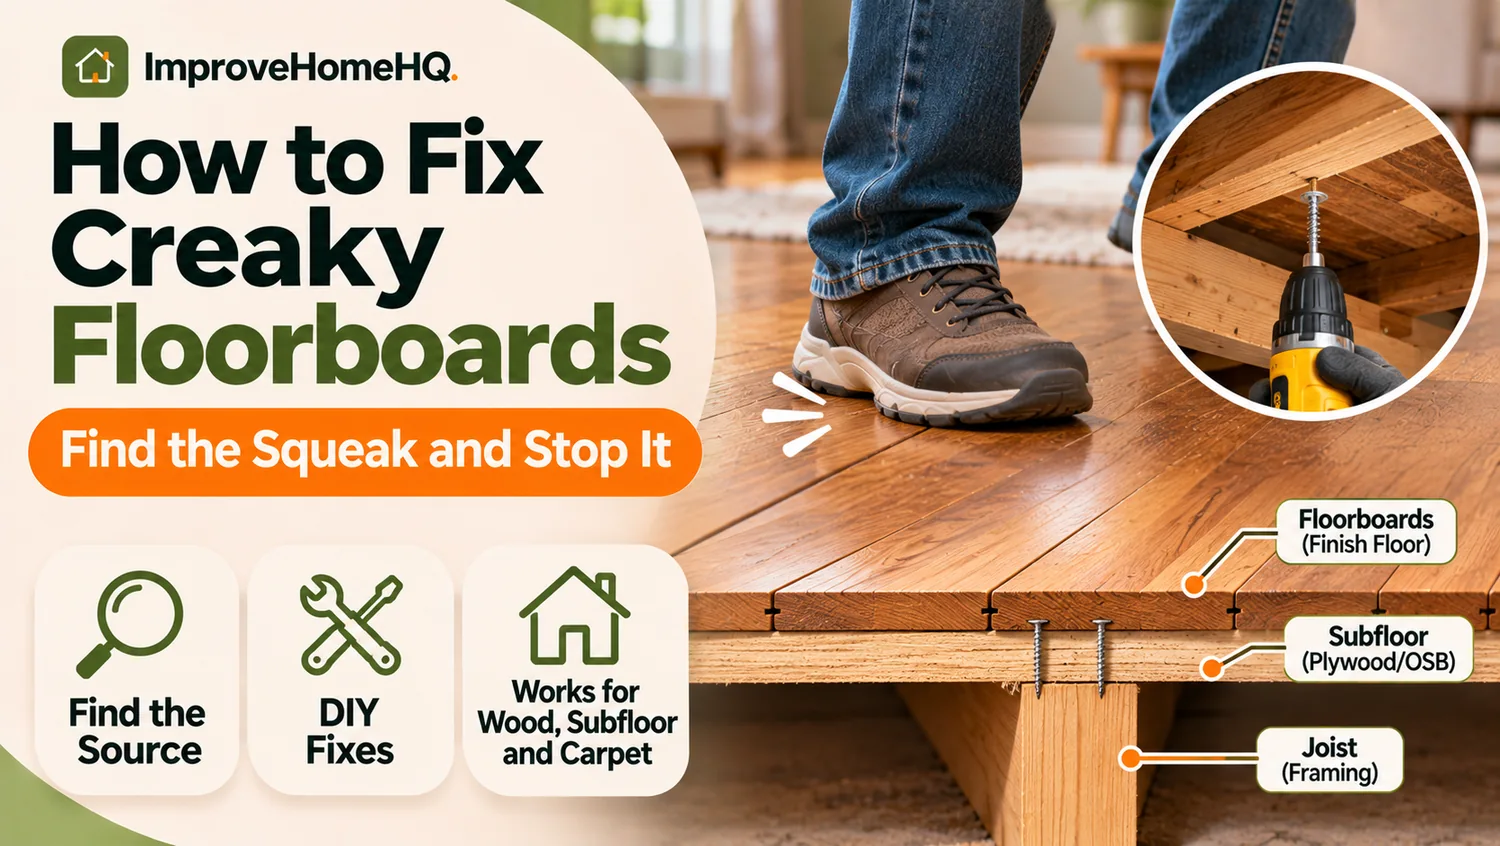
- Subfloor against joist: Plywood, oriented strand board (OSB), or older plank subflooring lifts slightly from the framing below.
- Subfloor against another layer: Underlayment or finish flooring shifts against its supporting surface.
- Other framing contacts: Blocking, bridging, ducts, or a wall connection can transmit a creak.
Humidity also matters. Wood absorbs and releases moisture, changing dimension as indoor conditions change. A floor may become noisier during dry winter weather and quieter in a humid season—or the opposite, depending on how tightly its components fit.
A little seasonal noise isn’t necessarily a defect. But visible deflection, soft areas, persistent dampness, or a growing dip in the floor deserve more attention than the sound alone. The National Wood Flooring Association’s homeowner guidance explains how moisture affects wood floors and recommends maintaining suitable, stable indoor conditions.
Before You Start: Pinpoint the Source
Spend five minutes diagnosing the squeak before buying anything.
- Walk slowly across the area. Mark the loudest spot with removable painter’s tape. Avoid sticking tape to delicate or newly finished surfaces without checking compatibility.
- Change where you step. Test directly on a board, along its edge, and on the next board. A squeak concentrated at a seam may be surface friction; a larger area that flexes may involve the subfloor.
- Look for movement. Have someone step on the spot while you watch for an edge lifting, a gap opening, or neighboring planks moving together.
- Check the room below, if accessible. From an unfinished basement or crawl space, have a helper repeat the step while you watch the subfloor-to-joist connection. Use a flashlight and stay clear of exposed wiring, plumbing, and moving equipment.
- Note the floor type. Solid hardwood nailed to a wood subfloor, floating engineered wood, laminate, and carpet over plywood cannot all be repaired the same way.
- Check for moisture clues. Staining, cupping, damp smells, swelling, or a nearby plumbing leak change the priority from quieting the floor to finding the cause.
Quick diagnosis guide
| What you notice | Likely source | Best starting point |
|---|---|---|
| Sharp squeak right at the seam between two exposed boards | Finished boards rubbing | A carefully tested dry-lubricant approach |
| Squeak plus slight bounce over a joist | Loose subfloor-to-joist connection | Inspect and refasten from below or above |
| Visible narrow gap between subfloor and joist | Subfloor moving into the gap | Lightly glued shim, if framing is otherwise sound |
| Squeak under carpet, with no access from below | Loose subfloor or fastener | Carpet-compatible repair kit after locating framing |
| Noise across a floating laminate or engineered floor | Underlayment, uneven base, or expansion restriction | Check installation instructions; avoid face screws |
| Widespread noise with sagging or softness | Possible damaged or inadequately supported floor system | Professional inspection |
If you can hear a squeak but cannot identify its source, resist fastening at random. Screws in the wrong place can miss the joist, penetrate services, or leave permanent holes without solving anything.
Tools and Materials You May Need
Not every repair needs every item. Gather only what fits the diagnosed problem.
- Flashlight, painter’s tape, tape measure, and protective eyewear
- Drill/driver and appropriate bits
- Wood screws suited to the floor assembly, or a specialized squeak-repair kit
- Stud or joist finder, plus a reliable way to confirm joist location
- Thin wood shims and a construction adhesive approved for the materials
- Small wood block or cleat where reinforcement is appropriate
- Color-matched filler or touch-up product for exposed finished wood
- Vacuum and clean cloth for a limited dry-lubricant test
Safety first: Determine whether electrical cables, plumbing, HVAC components, radiant heat tubing, or other concealed services are in the drilling path. Never assume a joist finder detects those hazards. If you cannot verify the assembly and the clearances, don’t drill. Wear eye protection when drilling overhead, and do not work under unstable framing.
How to Fix Creaky Floorboards: 5 Practical Methods
Start with the least invasive method that addresses the actual movement. A squeak that stops when you step beside a seam is different from a subfloor that visibly lifts off a joist.
1. Reduce Friction Between Exposed Wood Boards
Best for: A small squeak at a joint between finished wood planks, with no visible structural movement.
Some homeowners use a tiny amount of dry graphite formulated for appropriate surfaces to reduce friction in a noisy joint. It can be a temporary fix when boards rub against each other; it cannot fasten loose wood.
- Clean the joint and confirm the finish and flooring manufacturer permit the product.
- Test the lubricant in an inconspicuous location first. Graphite can stain light wood, grout, and nearby finishes.
- If compatible, apply only a minimal amount at the noisy joint according to the lubricant’s directions.
- Work it into the joint gently by stepping on the area, then remove all visible residue.
- Retest. If the squeak persists or the area flexes, stop adding powder and investigate the fastening below.
Avoid household oils, silicone sprays, water, and waxes unless specifically approved for the floor. They can create slippery residue, interfere with later refinishing or bonding, or damage the finish. Cornstarch and baby powder are common internet suggestions, but they are not a dependable repair for loose subfloors and may be unsuitable for some flooring finishes.
2. Secure a Loose Subfloor to a Joist
Best for: A localized squeak caused by a plywood or OSB subfloor moving against a joist.
If the underside is open, look for movement as your helper walks above. When the panel and joist should be tight but their connection has loosened, refastening may stop the rubbing.
- Identify the exact joist and panel section causing the noise.
- Confirm that the subfloor and joist are sound and dry. Fix damaged material before relying on new fasteners.
- Check for wiring, pipes, radiant tubing, and other hidden hazards; avoid all service routes.
- Choose a structural or subfloor-rated screw suited to the materials and thicknesses. Follow the fastener and subfloor manufacturer’s instructions for size, placement, and penetration.
- If fastening from above, make a properly located pilot hole where required and drive the screw through the subfloor into the joist. Recess the head appropriately without stripping the wood.
- Have your helper step on the spot again. Add fastening only where needed and permitted by the assembly.
If finished hardwood covers the subfloor, screwing down from above may create a visible hole or interfere with the flooring’s intended movement. Check the floor manufacturer’s instructions before drilling through finished boards. For a new floor, contact the installer first so you don’t compromise warranty coverage.
Don’t use drywall screws for this job. Choose fasteners designed for wood-floor or subfloor connections rather than brittle screws intended for gypsum board.
3. Fill a Small Gap Between the Subfloor and Joist
Best for: A clearly visible, narrow gap at an otherwise sound joist where the panel moves down when stepped on.
From below, a wood shim can prevent the subfloor from repeatedly rubbing or tapping the joist. This is not a remedy for a cracked, undersized, or sagging joist.
- Ask a helper to step on the squeaky spot while you observe the gap.
- Cut or select a thin shim that fits without forcing the panel upward.
- Apply a modest amount of construction adhesive compatible with wood and the particular subfloor material, following its instructions.
- Slide the shim gently into the gap until snug. Do not hammer it in hard or jack the floor upward.
- Remove adhesive squeeze-out as directed, allow it to cure, then retest.
Key mistake to avoid: Driving in an oversized shim may lift the subfloor, create a hump in the room, or move the squeak elsewhere. If the gap is substantial or changes dramatically under foot traffic, investigate the floor system instead of packing it tightly.
4. Reinforce a Moving Joint From Below
Best for: A short subfloor edge or older plank that lacks adequate support and moves locally.
Where a subfloor joint lacks firm bearing, a correctly placed wood cleat or blocking can give it additional support. This is more involved than shimming and isn’t always a DIY repair.
- Identify the specific unsupported or moving edge with a helper.
- Verify the joists, adjacent material, and surrounding framing are sound.
- Size the cleat or blocking to bear properly on supporting framing without disturbing pipes or cables.
- Install it with fasteners and adhesive appropriate to the assembly and load path, following approved guidance.
- Retest before closing up the ceiling.
Do not cut, notch, drill through, or reposition structural joists to chase a squeak. If there is cracking, significant sagging, or uncertainty about load-bearing details, consult a qualified contractor or structural professional.
5. Use a Squeaky-Floor Repair Kit From Above
Best for: A localized squeak beneath carpet, or certain exposed floors where the kit manufacturer expressly approves use.
Kits such as Squeeeeek No More use specialized scored screws and a guide to pull the flooring assembly tight, then break the screw head below the visible surface. The procedure varies by kit and floor type.
- Check that your exact flooring and subfloor materials are approved for the kit.
- Identify and verify the joist position using the kit’s procedure; don’t rely only on a stud finder’s initial signal.
- Inspect for utilities and heating elements below the planned screw location.
- Follow the prescribed guide, drill, and screw-depth sequence. Keep carpet fibers clear of the rotating screw shaft as instructed.
- Break off the head only with the specified tool and method, then check that nothing sharp remains at the surface.
- Walk the area again to see whether the movement and sound have stopped.
A kit may save you from pulling back carpet, but it isn’t risk-free. It may not work if a squeak comes from a loose finished plank rather than the subfloor, and the wrong screw or depth can damage the surface or hidden systems. Avoid improvising this technique with ordinary screws.
What If You Can’t Access the Floor From Below?
A finished basement ceiling or second-story floor limits your options, but you still have choices:
- Exposed solid hardwood: If the floor is face-fastened or can accept a carefully concealed fastener, a flooring professional may be able to secure an individual loose plank and fill the hole with a finish-matched repair product. A surface hole may remain visible in certain light.
- Carpet over a wood subfloor: A compatible breakaway-screw kit can address some joist-related squeaks from above. Alternatively, carpet can be lifted and re-stretched after the subfloor is repaired.
- Floating engineered wood or laminate: Do not drive screws through the planks to hold them down. Floating floors need to move as designed. Look instead for a high spot, inadequate subfloor flatness, trapped debris, a problem underlayment, or insufficient expansion clearance. Follow the particular product’s installation instructions.
- Glue-down flooring: A hollow or loose area may call for an adhesive repair approved by the flooring maker. Random injection holes can damage the finish, moisture barrier, or substrate and should not be treated as a universal solution.
For glued or floating products, it’s often worth checking the warranty and installation documentation before attempting a hidden repair. The underlying problem may be an installation issue, not a loose board.
How to Stop Floorboards Creaking Under Carpet
The carpet itself usually isn’t making the sound. More often, the subfloor, nail connection, or joist moves underneath it.
Start by pinpointing the squeak and determining where the joists run. If you have an accessible room beneath, an underside repair is typically easier to inspect and leaves the carpet untouched.
If only top access is available, use a carpet-rated squeak-repair system exactly as directed. A conventional screw can catch and twist carpet fibers, leaving a damaged or pulled area. Before committing, check that the carpet isn’t concealing a soft or water-damaged subfloor. Repairing the weak material takes priority over silencing it.
Should You Use Adhesive to Fix a Creaky Floor?
Adhesive can be useful when it bonds the correct two surfaces and the surfaces are compatible, clean, and stable. It isn’t automatically better than mechanical fastening.
Construction adhesive along an accessible joist-to-subfloor gap may help with a properly fitted shim or another approved repair. Products marketed for injection beneath a loose plank or tile have more specific applications and curing requirements.
An adhesive cannot reliably repair rotted wood, a broken joist, or an unstable connection that requires mechanical support. Avoid injecting generic glue into unexplained floor cavities: you may bond an area that needs to expand, interfere with a floating floor, or make a future repair harder. Always follow the flooring and adhesive manufacturers’ guidance.
Common Mistakes That Make Squeaks Worse
- Treating every sound as board friction. Powder won’t solve a subfloor lifting off its joist.
- Driving screws without identifying framing. Missing the joist leaves a hole and may add no support.
- Using screws that are too long. They can penetrate finished flooring or concealed services.
- Forcing a shim into place. Excess pressure can lift the floor and create a new squeak.
- Applying oil or wax to the floor. Products not approved for the finish may stain, create a slip hazard, or cause refinishing problems.
- Fastening a floating floor down. This can stop required movement and cause buckling or damage.
- Ignoring moisture. Water intrusion, cupping, and damaged wood need diagnosis before cosmetic repair.
For a technical explanation of the different locations where squeaks can originate, see APA – The Engineered Wood Association’s floor-squeak guidance. It emphasizes that each noise source needs inspection before selecting a corrective method.
How to Prevent Floorboards From Creaking Again
Some movement is normal, but you can reduce avoidable squeaks with basic maintenance and correct installation.
Keep humidity reasonably stable. The National Wood Flooring Association’s homeowner guidance recommends approximately 30%–50% relative humidity and 60°F–80°F for wood floors. Your flooring manufacturer’s specified range takes priority, especially for engineered products. Use a hygrometer to check conditions rather than guessing.
Address leaks promptly. Water near dishwashers, refrigerators, bathrooms, and exterior doors can swell flooring and weaken subfloor connections.
Follow installation requirements. Proper subfloor flatness, moisture testing, joist support, panel fastening, flooring acclimation, and expansion space all matter. Dimensions and fastener schedules vary by product and assembly, so don’t use one generic spacing rule for every floor.
Watch for changes over time. A squeak that appears only in dry weather and disappears may be minor. A new squeak alongside spreading gaps, movement, or a dip needs a closer look.
When to Call a Flooring Professional
A local flooring contractor can usually diagnose a persistent noise without immediately recommending a new floor. Call for an assessment when:
- Several rooms squeak or the noise returns after a sensible repair.
- The floor feels springy, soft, or uneven, or you see a growing sag.
- Boards show water staining, cupping, swelling, or suspected decay.
- The floor is newly installed or covered by a warranty.
- The assembly contains radiant heat or other hidden services you can’t locate safely.
- The repair requires lifting finished flooring, removing carpet, or modifying structural framing.
If the floor has substantial deflection or signs of framing damage, involve a qualified structural professional rather than simply adding more fasteners. A quiet floor isn’t necessarily a sound floor.
Frequently Asked Questions
Can I fix squeaky floorboards without removing them?
Often, yes. A surface-joint squeak may respond to a compatible dry lubricant, while a subfloor-to-joist squeak can sometimes be repaired from below. With no underside access, a suitable breakaway-screw kit may work for certain carpeted floors. The fix depends on the cause and floor construction.
What is the easiest way to stop a floorboard squeaking?
First locate the exact spot and check for visible movement. If the squeak is limited to friction at an exposed wood joint, a carefully tested dry lubricant is among the least invasive options. If a loose fastener or subfloor is moving, securing the connection is more likely to last.
Will WD-40 stop a squeaky wood floor?
Don’t use a general-purpose penetrating oil on finished flooring unless the floor manufacturer explicitly approves it. Such products can leave residue, discolor wood, create slippery areas, or complicate future finishing. Identify the mechanical cause instead.
Can you screw down a creaky hardwood floor?
Sometimes, but first determine whether the floor is solid hardwood, engineered wood, or floating flooring. A properly located screw may secure a loose solid-wood or subfloor connection, yet it can leave a visible hole. Never fasten a floating floor through its face just to silence a squeak.
Are creaky floors a sign of structural problems?
Usually not by themselves. Localized friction and minor movement are common. However, squeaks accompanied by softness, sagging, major bounce, cracking, or water damage warrant professional inspection.
Why does my floor creak more in winter?
Indoor heating often lowers relative humidity, allowing wood to lose moisture and shrink slightly. That can loosen joints or change how boards contact fasteners. Seasonal change can also make a previously quiet connection noticeable.
Do creaky floorboards need replacing?
Not usually. Many squeaks can be reduced by correcting a loose joint or subfloor connection. Replacement may be needed when boards or subfloor panels are badly damaged, rotten, delaminated, or no longer provide adequate support.
The Bottom Line
The most reliable way to quiet a floor is to stop the movement producing the noise. Find the exact spot, identify whether the friction is at the finished boards or deeper in the subfloor, and choose the least invasive repair that actually addresses it. A small shim or correctly positioned fastener can make a big difference—but widespread movement, moisture damage, and unfamiliar floor systems call for more than a quick fix.