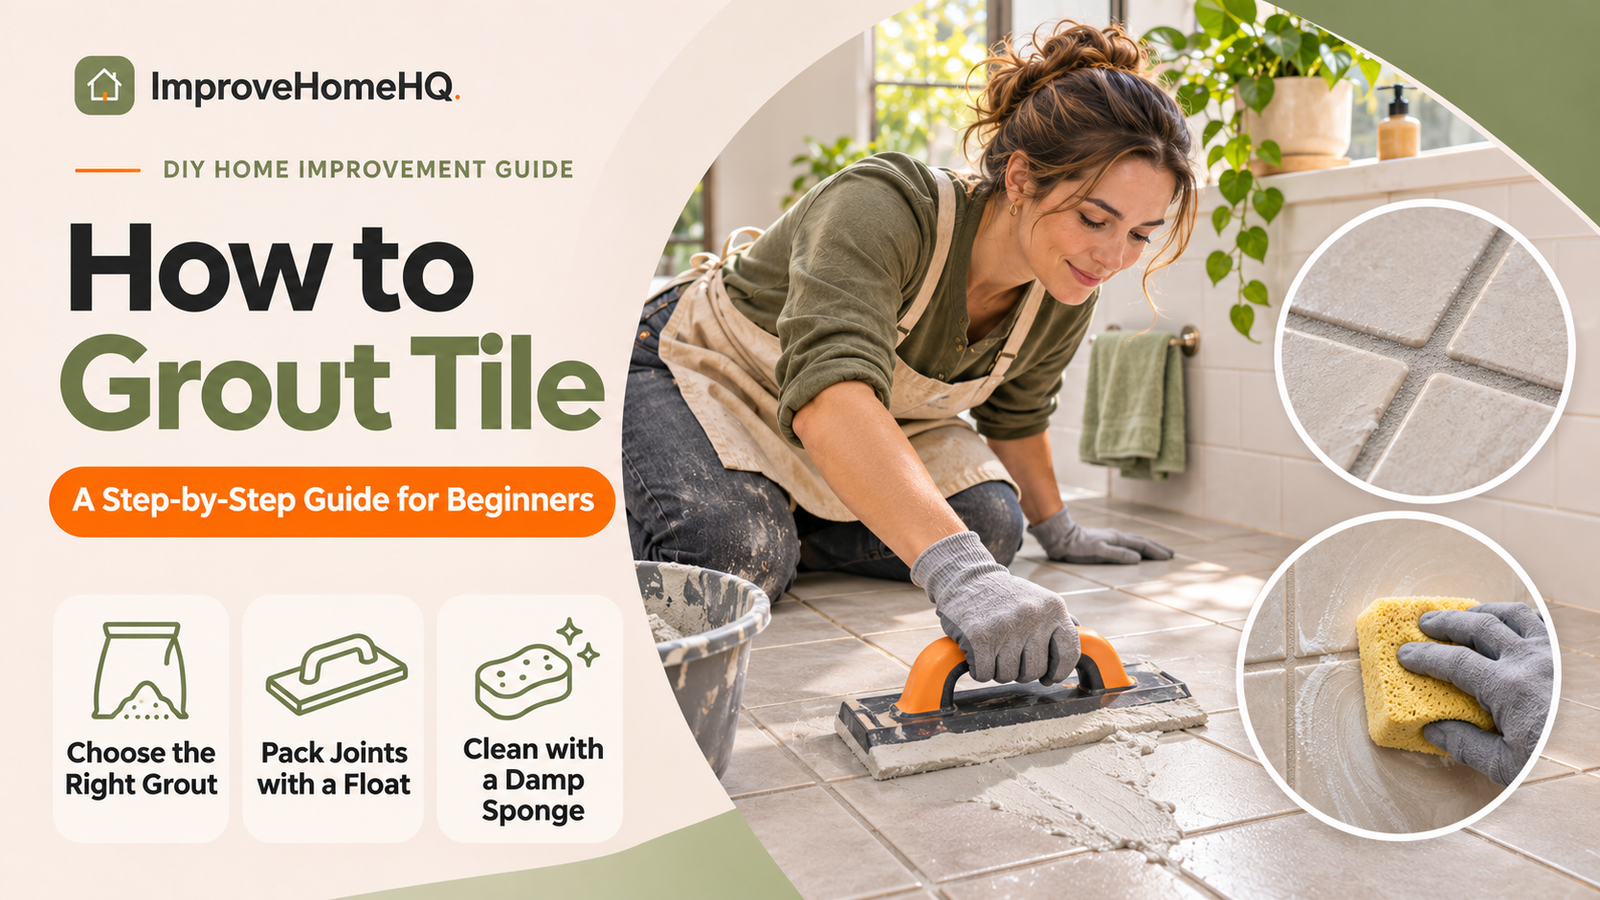
How to Grout Tile: A Step-by-Step Guide for Beginners
Quick answer: To grout tile, allow the tile-setting mortar to cure, clean out the joints, and choose grout compatible with your tile and joint width. Mix the grout exactly as directed, then use a rubber grout float to pack it firmly into the joints. Scrape off excess diagonally, wait until the grout is ready for cleanup, and wipe with a barely damp grout sponge. Remove remaining haze, protect the installation while it cures, and seal only if the grout manufacturer recommends it. Use flexible sealant—not grout—at designated movement joints and changes of plane.
Grouting is the stage when individual tiles start to look like a finished floor, backsplash, or wall. It is also a stage where small mistakes show: too much wash water can leave patchy color, rushed cleanup can pull grout out of the joints, and the wrong material can scratch delicate tile.
The good news is that most DIY grouting jobs are manageable if you prepare properly and work in small sections. This guide explains the tools, grout choices, application technique, curing, and fixes that matter most.
What You’ll Need to Grout Tile
Materials
- Grout approved for your tile, joint width, and installation location
- Clean water, if required by the grout product
- Painter’s tape and protective plastic or drop cloths
- Matching flexible tile sealant for changes of plane, when specified
- Grout sealer, only if appropriate for the selected product
Tools
- Rubber grout float
- Grout sponge (not an ordinary kitchen sponge)
- Two clean buckets for rinse water, plus a mixing bucket if using powder
- Margin trowel or manufacturer-approved low-speed mixing tool
- Shop vacuum with a brush attachment
- Clean microfiber cloth or cheesecloth, if recommended
- Knee pads for floors
- Gloves, safety glasses, and suitable dust protection when handling powdered cement-based grout
Before you start: Read the grout’s current technical data sheet (TDS), not just the instructions on a general DIY video. Joint-width limits, mixing water, slaking, working time, cleanup window, and protection requirements vary substantially by product.
Choose the Right Grout for Your Tile
The word grout describes several different products, not one universal mixture. Match the product to the tile material, joint size, moisture exposure, and expected traffic.
| Grout type | Common uses | Watch out for |
|---|---|---|
| Sanded cement grout | Many wider joints and floors | Aggregate can scratch polished stone, glass, or sensitive finishes; check the tile and grout instructions. |
| Unsanded cement grout | Narrow joints and scratch-sensitive tile where approved | May not be suitable for wider joints or every floor installation. |
| High-performance fine-aggregate cement grout | Some products cover both narrow and wider joints | Joint-width range and cleanup timing are product-specific. |
| Epoxy grout | Projects needing strong stain or chemical resistance | Usually more demanding to mix and clean; follow the system’s exact directions. |
| Ready-to-use specialty grout | Certain interior wall or floor applications | Not all products are approved for shower floors, steam rooms, submerged areas, or other demanding locations. |
Sanded vs. unsanded: Is the 1/8-inch rule always correct?
The traditional rule is that unsanded grout serves narrow joints and sanded grout serves wider ones. It is a useful starting point, not a universal specification. For example, some modern fine-aggregate grout products are approved across a much wider joint-width range. The product label and technical data sheet take precedence over a generic 1/8-inch cutoff.
For marble, polished natural stone, glass, metallic finishes, or easily scratched tile, test the grout in an inconspicuous spot or on a spare tile. Do not assume that a product described as “fine” cannot scratch the surface.
Which grout color should you use?
A close color match gives tile a calmer, continuous appearance; a contrasting color emphasizes the pattern and reveals variations in joint width. White and very light grout can show dirt readily on busy floors, while dark grout can display light-colored residue from cleaning or mineral deposits.
Check the color against your actual tile in the room’s lighting. If consistent color is critical, make a small sample board before committing to the entire room.
How to Grout Tile: 9 Steps
These steps work as a general workflow for many cement-based grouts. Follow your specific product instructions whenever they differ, especially for epoxy, premixed, rapid-setting, and other specialty materials.
Step 1: Confirm the tile is ready
Do not grout just because the tiles feel firmly attached. The mortar or adhesive underneath needs the curing period specified by its manufacturer. Some setting products permit grouting sooner than others; moisture, temperature, substrate, and tile type affect timing.
Check for loose, rocking, or damaged tiles. Grout will not secure a poorly bonded tile or correct movement in the substrate. Fix those problems first.
Step 2: Clean and inspect the joints
Remove tile spacers unless the installation system explicitly says otherwise. Carefully clear excess thinset mortar, dust, and debris from the joints without damaging waterproofing, tile edges, or the setting bed. A utility knife or grout-removal tool can be useful, but work gently around fragile finishes.
Vacuum the joints and wipe the surface as required by the grout manufacturer. Keep the joints free of standing water. Some grout products call for lightly dampening tile surfaces before application; others require different preparation.
Do not grout over failing old grout. If you are regrouting, remove the deteriorated material to the depth recommended for the new product and address any underlying moisture or movement issue.
Step 3: Protect adjacent surfaces and leave movement joints open
Tape cabinet edges, trim, fixtures, and surfaces that could stain. If you are working on porous or textured tile, check whether the manufacturer recommends a grout-release product or pre-sealing. Test any treatment first so it does not alter the tile’s appearance.
Keep specified movement joints clear of rigid grout. These often occur at wall-to-floor transitions, inside corners, perimeters, and other locations called out by the tile assembly design. The Tile Council of North America’s EJ171 movement-joint guidance is commonly referenced in grout manufacturers’ installation instructions. Use the appropriate sealant or movement-joint profile for the assembly.
Step 4: Mix a small batch correctly
For powdered grout, measure clean water and powder according to the package. Mix at the recommended speed until uniform. Avoid guessing the water quantity based only on whether the mixture looks like peanut butter: overly wet grout can have weaker joints and uneven color.
Some cement-based products require a short resting period called slaking, followed by remixing. Others specifically tell you to begin applying immediately. Check the TDS before adding that step.
If grout begins to stiffen in the bucket, do not automatically add water. Adding water after mixing can damage performance or color consistency; follow the product’s re-mixing instructions. Mix only what you can place and clean within its working time.
Safety: Powdered cement grout may contain respirable crystalline silica, and wet cement-based material can irritate or burn skin. Follow the product’s safety data sheet; avoid breathing dust and wear appropriate eye and hand protection.
Step 5: Pack grout firmly into the joints
Scoop grout onto a rubber float and spread it across the tiles. Hold the float at an angle and move across the joints from more than one direction to push grout to the bottom of each gap. Work methodically rather than spreading a thin film across a large area.
On a backsplash or shower wall, load a manageable amount onto the float and work upward or diagonally to limit dropped material. On a floor, begin at the far side and plan a route toward the exit so you do not step across freshly grouted tile.
The goal is a fully packed joint without holes or voids, not a thick layer of grout on the tile faces.
Step 6: Scrape off excess with diagonal passes
While the grout is still workable, tilt the float more upright and draw it diagonally across the joints. This removes most of the material from the tile surface without digging it out of the gaps.
Leave the joint surface even and consistent with the tile edge, as permitted by the grout and tile profile. Do not repeatedly drag the float straight down the joint, which can scoop material out.
Step 7: Wait for the correct cleaning window
The first wash is often the most difficult part for beginners. Clean too early and you can wash pigment or grout out of the joints; wait too long and residue may harden on the tile.
Follow the product’s readiness test and timing. For example, MAPEI’s Ultracolor Plus FA instructions commonly specify a roughly 15–30-minute initial set at room temperature before cleaning, with a shorter window for some highly absorbent tile. That range does not apply to every grout. Temperature, humidity, tile porosity, and product formulation change the timing.
Test a small area. The grout should be firm enough that a gently drawn damp sponge does not remove substantial material from the joint.
Step 8: Sponge lightly with clean water
Fill two buckets: one to rinse out most residue and a second with cleaner water for the final sponge rinse. Wet the grout sponge, then wring it until it is damp rather than dripping.
Wipe diagonally across the joints with light pressure. Turn the sponge to a clean side, make another pass, and rinse frequently. Resist scrubbing or making repeated wet passes over the same joint. Those habits can produce low joints, pale grout, or a blotchy finish.
Change water often. Your job at this stage is to remove surface residue and shape the joints gently—not to make every tile perfectly shiny in a single wash.
Step 9: Remove haze and protect the grout while it cures
When a light haze develops, buff the surface with the material and at the time specified by the grout manufacturer. A clean dry cloth works for some cement grouts; other products require a particular cleaner or wash procedure.
If hardened haze remains, identify your tile type and grout type before using a haze remover. Acidic products can damage natural stone and some tile or grout surfaces. Never reach for vinegar or a strong acid as an automatic first fix.
Keep traffic, water, cleaning chemicals, and other exposure off the installation for the times specified by the grout and setting-material manufacturers. Let the material cure fully before any sealer or normal cleaning regimen.
How Long Does Tile Grout Take to Dry and Cure?
There is no single safe “24-hour rule.” The earliest time for light foot traffic, shower use, water immersion, chemical cleaning, and sealing can be different, even for the same grout.
| Milestone | What to check |
|---|---|
| First sponge cleanup | Manufacturer’s initial-set/cleanup window |
| Light foot traffic | Grout’s specified traffic time and the tile-setting mortar’s requirements |
| Shower or wet-area use | Grout’s water-exposure instructions, sealant cure time, and complete waterproofing assembly |
| Applying grout sealer | Whether sealer is needed, plus specified grout cure time |
| Deep cleaning | Product-approved cleaner and wait time |
Rapid-setting cement grout may permit relatively early traffic; other cement products need longer protection. Epoxy and ready-to-use products have their own schedules. Cool or humid conditions can slow curing. Never use “dry to the touch” as the sole test for returning a shower to service.
For product-specific examples, see MAPEI’s Ultracolor Plus FA technical instructions.
Do You Need to Seal Grout?
Not always. Many traditional cement-based grouts benefit from a compatible penetrating sealer, but some high-performance grouts are designed without a separate sealing requirement. Epoxy and specialty ready-to-use grouts can have different recommendations.
A grout sealer helps resist staining and makes routine cleaning easier; it does not make a shower waterproof. Shower waterproofing belongs behind or beneath the tile in a properly designed system. Grout and tile finishes are not a replacement for that waterproofing.
If your grout calls for sealing, let it cure for the required period, choose a manufacturer-approved sealer, test it in an inconspicuous area, and apply it as instructed. Wipe unwanted sealer from tile faces before it dries. Do not apply grout sealer indiscriminately to glazed tile or natural stone without checking compatibility.
For an example of how curing, protection, and optional sealing vary by formula, consult CUSTOM Building Products’ Polyblend Plus Sanded Grout data sheet.
Special Tips for Floors, Backsplashes, and Showers
Grouting a tile floor
Work toward an exit. Keep grout, buckets, and tools off finished joints, and avoid walking on the floor until the system permits traffic. Large floors may require several small batches and consistent mixing to prevent differences in appearance. If the floor has movement joints, preserve them.
Grouting a kitchen backsplash
Protect countertops, outlets, cabinets, and painted walls. Turn off power at the appropriate circuit when working around electrical boxes, and keep moisture and grout out of electrical components. Wall tiles can be small or textured, so clean a test section before coating the entire backsplash.
Grouting shower walls and floors
Confirm the shower’s waterproofing system was installed correctly before grouting; grout cannot rescue a leaking shower pan or improperly treated seam. Use products specifically approved for the shower surface and exposure. Keep corners, wall-to-floor transitions, and other designated movement joints available for appropriate flexible sealant. Let grout and sealant meet their separate cure requirements before turning on the shower.
Grouting natural stone and textured tile
Polished marble, limestone, slate, and rough-surface tile can stain, scratch, or trap residue. Check the tile supplier’s instructions; make a sample board and use a compatible grout-release treatment or pre-sealer if needed. Avoid abrasive scrubbing or acidic haze removers on acid-sensitive stone.
Common Grouting Mistakes and How to Avoid Them
| Mistake | Why it matters | Better approach |
|---|---|---|
| Adding extra water to make grout easier to spread | Can weaken cement grout and cause color variation | Measure precisely and respect mixing instructions |
| Washing too early or using a soaking-wet sponge | Can pull grout out or create pale, powdery joints | Wait for the specified cleanup point; wring out sponge thoroughly |
| Covering a large area at once | Haze can harden before cleanup | Work in sections suited to the product’s working time |
| Grouting corners and movement joints | Rigid grout may crack where surfaces move | Use specified flexible sealant or joint profiles |
| Ignoring tile sensitivity | Sand or cleaners may scratch or stain finishes | Test grout and cleaning methods first |
| Assuming any grout works in a shower | Product limitations and waterproofing needs differ | Check wet-area approval and the whole assembly |
| Treating sealer as waterproofing | It cannot correct leaks behind tile | Use a properly waterproofed substrate and assembly |
Troubleshooting Problems After Grouting
Why is my grout color uneven?
Uneven color can come from inconsistent water measurements, excess wash water, varying tile absorption, different batch conditions, or residue left on the surface. Wait for the full cure before judging color. Clean the tile using the grout manufacturer’s approved method; do not apply a colorant or acid cleaner without determining the cause.
Why is new grout cracking or crumbling?
Possible causes include excessive water, poor joint preparation, movement in the tile or substrate, incorrect grout selection, or curing problems. Hairline cracking at an inside corner often points to a movement-joint issue. If a tile moves when pressed, repair the installation rather than simply filling the crack again.
What if I left pinholes or low spots?
Small voids may indicate incomplete packing or overaggressive sponging. Follow the manufacturer’s procedure for repair; fresh grout applied as an extremely thin skim coat over cured grout may not bond or last. For significant defects, remove affected grout to the required depth and reapply correctly.
How do I remove stubborn grout haze?
First confirm whether the residue is cement grout, epoxy residue, or a film from a ready-to-use product. Use the corresponding manufacturer’s approved cleaning process and timing. Some haze cleaners are unsuitable for natural stone, metal, or acid-sensitive finishes. Test a small spot and avoid aggressive scraping.
Can I grout over existing grout?
Not as a routine shortcut. New grout needs adequate clean joint depth and a stable surface. A thin new layer over dirty or deteriorating grout is likely to fail. Remove the damaged grout as directed by the replacement product; if grout repeatedly cracks, investigate movement or moisture before regrouting.
Frequently Asked Questions
Can a beginner grout tile successfully?
Yes. A small backsplash or straightforward floor is a reasonable DIY project if the tiles are securely installed and you follow the grout manufacturer’s directions. Epoxy products, fragile stone, and complicated wet-area repairs may call for an experienced installer.
What is the best tool for applying grout?
A rubber grout float is the standard tool for working grout into tile joints. A grout sponge removes residue and helps shape the finished joint. A putty knife or bare hand does not provide the same controlled, uniform packing.
Should grout be level with the top of the tile?
A finished joint should be uniformly filled and appropriately shaped for the tile edge and grout manufacturer’s instructions. Avoid deep, hollow channels and avoid leaving ridges of grout standing above tile faces. Beveled or rounded tile edges may make the visible joint look slightly recessed.
Can I use the same grout on walls and floors?
Sometimes. Many products are rated for both, but the joint width, tile finish, traffic, and wet-area exposure must all be compatible. Check the actual product label rather than assuming one bag suits every surface.
Is premixed grout easier than powdered grout?
It may eliminate on-site powder mixing, but that does not automatically make it the better choice. Ready-to-use grout can have distinct limits for exposure, application, curing, and cleaning. Confirm suitability for your project before choosing convenience over performance.
Do I need to wet the tile before grouting?
Only when the grout manufacturer calls for it. Some products recommend lightly dampening the surface with a well-wrung sponge to improve application. Never leave puddles or fill the open joints with water.
How soon can I shower after grouting?
Use the specific grout and sealant manufacturers’ water-exposure times, together with any requirements for the complete shower assembly. A shower may require a longer wait than a dry floor needs before light foot traffic.
Is grout waterproof?
No. Ordinary cement grout is not a waterproofing membrane. Even when grout is stain-resistant or sealed, a shower needs its own properly installed waterproofing system.
Final Checklist Before You Call the Job Done
- The mortar underneath the tile was ready for grouting.
- Joints were cleaned and packed fully without trapped debris.
- The correct grout was chosen for the joint width, tile, and location.
- Mixing, cleanup, and curing matched the specific product instructions.
- Movement joints were kept free for their specified flexible sealant.
- Tile faces are free of residue, and joints are even and intact.
- Traffic, water exposure, and sealing are delayed until the manufacturer permits them.
Grouting is more about timing and consistency than speed. Prepare the joints, mix accurately, pack the grout firmly, and clean gently. Those habits will do more for a professional-looking result than any last-minute polishing trick.