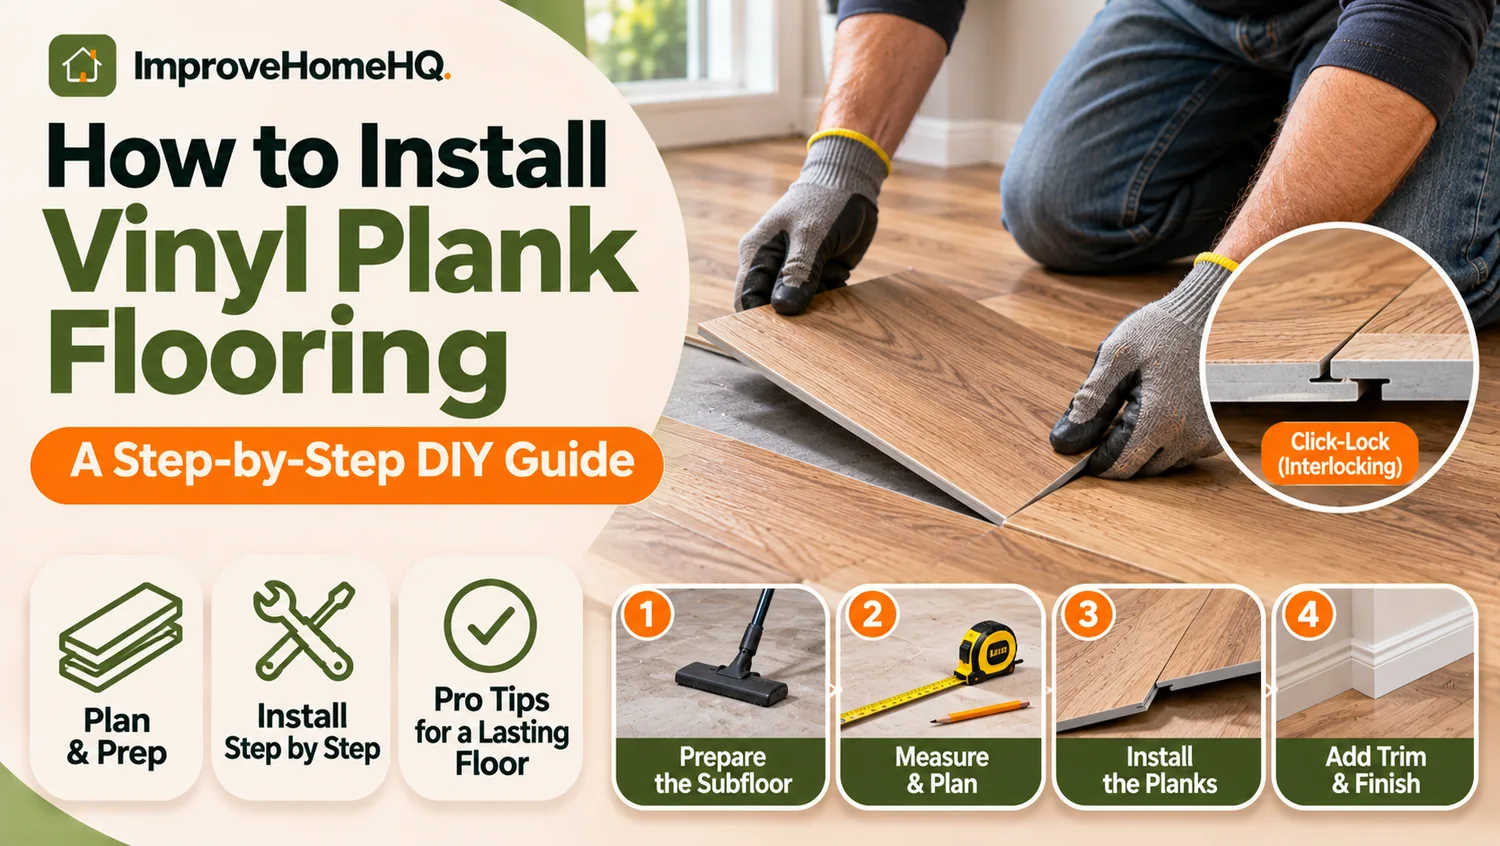
How to Install Vinyl Plank Flooring: A Step-by-Step DIY Guide
Quick answer: To install click-lock vinyl plank flooring, remove unsuitable old flooring, clean and flatten the subfloor, check moisture conditions, and plan your row widths. Lay the first row straight with the expansion gap required by your flooring manufacturer. Connect subsequent planks using the specified locking method, stagger end joints, cut around obstacles, and finish with trim attached to the wall—not the floating floor. Always follow the instructions for your exact product: gap sizes, underlayment, acclimation, and moisture requirements vary.
Vinyl plank flooring can give a room the look of wood without the upkeep of traditional hardwood. Many rigid-core click-lock products are designed for homeowners to install, but the locking mechanism is usually the easy part. A flat, dry, sound subfloor and a carefully measured layout make the difference between a floor that feels solid and one that develops gaps or movement.
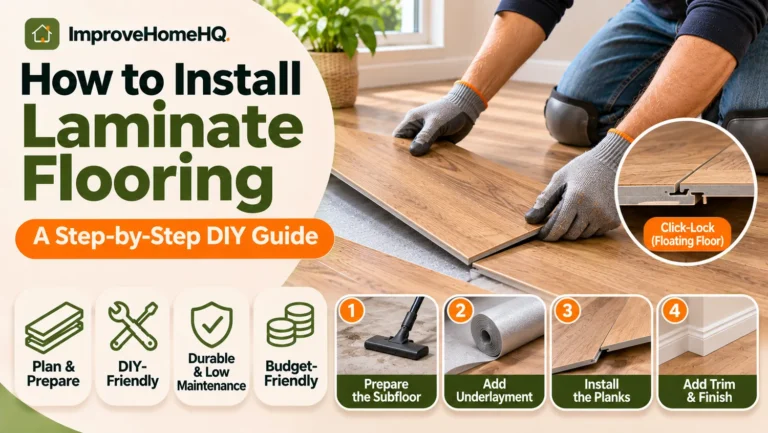
This guide focuses on floating, click-lock luxury vinyl plank (LVP), the common DIY choice. Glue-down and peel-and-stick planks use different installation methods, covered briefly below. Keep your product’s printed installation instructions nearby throughout the project; they take priority over general advice.
Before You Start: Choose the Right Installation Method
| Flooring type | How it stays in place | What to know |
|---|---|---|
| Click-lock LVP (including many SPC and WPC products) | Planks interlock and float over the subfloor | Usually DIY-friendly; requires perimeter clearance and an approved subfloor |
| Glue-down LVP | Flooring adhesive bonds planks to the substrate | Needs careful surface and moisture preparation, approved adhesive, and rolling as directed |
| Peel-and-stick vinyl plank | Factory-applied adhesive bonds each plank to the substrate | Depends heavily on a clean, smooth, approved surface; not installed like a floating click-lock floor |
SPC means stone-plastic (or stone-polymer) composite, a rigid-core construction. WPC refers to wood-plastic (or wood-polymer) composite. These labels describe core types, not a universal installation standard. Two click-lock products may require different joint patterns, expansion spaces, and temperature conditions.
How Long Does Installation Take?
A simple, empty room may take a DIYer a day for layout and installation, with additional time for removal, subfloor repairs, and trim. Complex doorways, uneven concrete, and multiple rooms can extend the job considerably. Do not plan around a short retailer estimate until you have checked the subfloor.
Tools and Materials You’ll Need
Flooring and installation supplies
- Vinyl planks from the same product and compatible lot or dye run, plus extra material for cutting waste
- Manufacturer-approved spacers for perimeter and fixed-object gaps
- Tapping block, pull bar, and rubber mallet only if your locking system permits them
- Approved underlayment or moisture-control membrane only when required or permitted
- Appropriate floor patch or leveling material, plus primer when specified
- Transition strips, baseboards, or shoe molding as needed
Tools
- Tape measure, pencil, chalk line, and speed square or straightedge
- Long straightedge or level to check flatness
- Utility knife with spare blades; vinyl plank cutter if useful
- Jigsaw or oscillating multi-tool for notches and door jambs
- Vacuum, scraper, and pry bar
- Safety glasses, work gloves, hearing protection for power tools, and knee pads
Some rigid planks score and snap cleanly. Others cut more reliably with a saw. Check the flooring manufacturer’s cutting guidance; use dust control appropriate to the material and tool.
Step 1: Measure the Room and Buy Enough Flooring
Measure the longest and widest parts of the room in feet, then multiply to estimate square footage. For an irregular room, divide the floor into rectangles and add their areas. Subtract only major areas that will not be floored.
Example: A 12-by-15-foot room has 180 square feet of floor area. With a planning allowance of 10% for cuts and mistakes, buy approximately 198 square feet, rounded up to full cartons. A simple rectangular room may waste less; diagonal layouts and many corners can waste more. Check the retailer’s return policy before buying extra boxes.
Inspect carton labels to confirm the product, color, thickness, and locking profile match. Open several cartons during installation and blend planks to avoid concentrating similar printed patterns or shades in one spot.
Step 2: Check Whether the Existing Floor Can Stay
A click-lock floor often can go over certain hard, stable, flat existing surfaces, but this is product-specific.
- Carpet and carpet padding: Remove them. A soft base lets joints flex and potentially separate.
- Existing vinyl: Some manufacturers allow one securely bonded, smooth layer; others have restrictions. Repair loose edges and check the height at doors and appliances.
- Ceramic tile: Often possible if the tile is firmly attached and grout joints or uneven areas are corrected to the product’s flatness specification.
- Wood subfloors: Check for loose panels, squeaks, water damage, and movement. Secure and repair them before covering.
- Existing floating flooring: Generally remove it unless the new manufacturer explicitly approves the assembly. Stacking floating floors can create movement.
Older-flooring safety: If existing flooring, adhesive, or underlayment might contain asbestos, do not sand, grind, scrape aggressively, or otherwise disturb it until it has been evaluated. The U.S. Environmental Protection Agency’s asbestos guidance explains why suspect materials should be assessed before disturbance. Older painted trim may also require lead-safe precautions.
Step 3: Prepare the Subfloor—Flat, Clean, Dry, and Solid
Preparation is the most important part of this project. Waterproof planks do not make a wet or unstable subfloor safe to cover.
Check Flatness, Not Just Level
A floor can slope slightly and still be suitable if it is uniformly flat. A floor that is level but has dips and bumps can damage click joints. Put a long straightedge across the floor in several directions and mark high and low areas.
The acceptable variation is set by your product. For example, some vinyl products specify 3/16 inch over 10 feet, while others are stricter. Do not assume one number applies to every brand. Follow the tolerance, measurement span, and repair method in your installation guide.
- On a wood subfloor, fasten loose panels, replace damaged sections, and use a compatible patching or leveling product where allowed.
- On concrete, repair cracks and low spots with a material approved for your substrate and flooring system. Grind high spots only after checking for hazardous older materials and using appropriate dust protection.
- Vacuum thoroughly. Grit left behind can cause bumps, noise, or poor support.
Self-leveling compound is not simply a liquid you can pour and forget. Substrate preparation, primer, water ratio, working time, pour depth, and curing time are all product-specific. Large or widespread corrections may be worth hiring a floor-preparation professional.
Check for Moisture
Look for leaks, damp spots, musty odors, staining, or signs of water intrusion. Resolve the source before installation.
Concrete can release moisture even when its surface appears dry. Your flooring maker may require concrete moisture testing, a specified vapor retarder, or both. Common referenced test methods include ASTM F2170 (in-situ relative humidity) and ASTM F1869 (calcium chloride), but use the method and acceptance limits required by your chosen flooring and any adhesive. Do not use an arbitrary DIY moisture threshold.
For wood subfloors, inspect for water damage and comply with the flooring’s moisture and environmental limits. In basements or below-grade rooms, pay special attention to slab moisture and the product’s below-grade approval.
Step 4: Follow the Product’s Acclimation and Underlayment Rules
There is no single acclimation period for all vinyl plank flooring. Some products require time in the installation space; others specify no waiting period under normal conditions. Maintain the room’s required temperature and humidity before, during, and after installation, and follow the cartons’ storage instructions.
Likewise, do not automatically add foam underlayment. Many click-lock planks have an attached pad. Extra cushioning can allow unwanted movement or invalidate a warranty. If a concrete vapor retarder or acoustic layer is required, use only a type and thickness approved by the flooring manufacturer.
For a useful manufacturer-level overview of preparation, materials inspection, joint spacing, and undercutting, consult Shaw Floors’ luxury vinyl installation guidance. Your exact product guide remains the final authority.
Step 5: Plan the Layout Before Laying the First Plank
Planning prevents an awkward sliver along the last wall and makes the finished floor look intentional.
Choose a Direction
Many homeowners run planks along the room’s longest dimension or toward the main light source. In connected spaces, a consistent direction can make transitions look cleaner. The room’s shape, doorways, and manufacturer instructions matter more than an absolute aesthetic rule.
Calculate First- and Last-Row Widths
Measure the room perpendicular to your planned plank direction at several points. Subtract the perimeter expansion spaces and determine how many full-width rows fit.
Suppose the usable room width is 121 inches and each plank is 7 inches wide. Seventeen full rows use 119 inches, leaving a 2-inch final strip. If the manufacturer requires the last row to be at least one-third of a plank wide, 2 inches is too narrow. Rip the first row narrower so both edge rows are acceptably wide. Dry-lay or calculate the rows before cutting.
Walls are rarely perfectly straight. Snap a straight reference line rather than blindly following a crooked wall. You can trim the wall-side edge of the first row to maintain the proper gap and keep the visible plank joints straight.
Plan End-Joint Staggering
Avoid aligning the short-end seams in adjacent rows. Manufacturers specify minimum offsets, and some restrict repeated stair-step or H-joint patterns. A minimum of 8 inches appears in some guides, but it is not universal. Follow your product’s required end-joint separation and minimum starter/finish-piece lengths.
Arrange planks from multiple cartons and rotate repeated woodgrain patterns so the same design does not appear in obvious clusters.
How to Install Vinyl Plank Flooring: Step by Step
These steps describe a typical click-lock floating floor. Locking profiles vary: some click at an angle, others use drop-lock ends or require assembling an entire row first. Never hammer directly on a locking tongue or force a connection that does not match the instructions.
Step 6: Remove Trim and Undercut Door Jambs
Score the paint or caulk line above baseboards with a sharp utility knife. Gently pry them off and label reusable pieces. Remove shoe molding if present.
To fit flooring neatly under a door casing, place a scrap of your plank (and approved underlayment, if used) beside the jamb. Rest an oscillating saw blade on the scrap and cut the casing at that height. Check that a plank can slide underneath without eliminating the required movement gap around the fixed framing.
Check door clearance, stair edges, cabinets, and appliance openings before committing to the layout. A thicker floor may require door adjustments or a transition profile.
Step 7: Install the First Row
- Start along your chosen reference wall, using the orientation required by the locking system.
- Position spacers to maintain the specified expansion clearance at the wall and fixed objects. A 1/4-inch gap is common, but not universal.
- Connect the first planks with their short-end joints using the correct locking motion. Keep the row straight.
- At the far wall, measure the remaining space, allowing for the required gap. Mark the last plank and cut it to size.
- Confirm the row is aligned with your reference line before proceeding. A crooked first row can make every later row harder to lock.
If the wall is bowed, scribe and trim the wall-side edge rather than compressing the required clearance.
Step 8: Lay the Second Row and Continue Across the Room
Begin with a cut starter plank of an approved length to create the required stagger. Angle the long edge into the previous row as directed, then join the short end—or assemble the full row first if that is how your product works.
For each new plank:
- Inspect the groove and tongue for chips and debris.
- Engage the joint in the sequence required by the manufacturer.
- Check that the joint closes flush, without a raised lip or visible gap.
- Use a manufacturer-approved tapping block or pull bar if needed. Gentle, controlled force is better than repeated hard strikes.
- Recheck straightness and perimeter gaps after every few rows.
If a joint refuses to close, stop. Lift and reset the plank, clean out debris, and check the locking profile. Forcing it can permanently damage the edge. Do not continue laying rows over a visibly open joint.
Step 9: Cut Planks Around Corners, Pipes, and Obstacles
For straight cuts, mark the plank with a square, score its finished face with a sharp utility knife if the product permits, and snap along the line. For thick rigid cores, a vinyl cutter or saw may be easier.
For an L-shaped notch or irregular cut, transfer the measurements carefully and cut with a jigsaw or appropriate power tool. Keep the specified clearance around pipes, posts, and other immovable surfaces; use an approved trim collar or molding to cover the opening.
Do not tightly wedge planks against a fireplace hearth, island, doorframe, or pipe. These are fixed objects, and a floating floor needs its prescribed room to move. Do not cut or grind masonry simply to hide a gap without considering the construction, silica-dust hazards, and an appropriate finishing method.
Step 10: Fit the Last Row
Measure the distance from the installed flooring to the wall at several points. Subtract the required expansion clearance, then transfer those measurements to the last-row planks. Cut the planks lengthwise to fit.
Use a pull bar only where permitted by the flooring instructions to seat the last row gently. Check that the perimeter clearance remains open along its full length and that no cut piece is below the manufacturer’s minimum allowable width.
Step 11: Install Transitions and Baseboards
Remove spacers after the flooring is complete. Reinstall baseboards or add shoe molding to conceal the perimeter gap while leaving the floor free to move.
Fasten baseboards and shoe molding to the wall or baseboard—not through a floating plank. Do not fill ordinary expansion gaps with hard caulk or construction adhesive. In wet areas or at specific fixtures, use the manufacturer’s approved sealing detail without restricting movement.
Use the required transition or reducer where the new floor meets carpet, tile, another floor height, door thresholds, or a separate floating-floor area. Maximum uninterrupted floor dimensions and doorway transition rules vary by product; do not assume you can run planks through an entire home without breaks.
Installing on Concrete vs. Plywood: What Changes?
| Check | Concrete slab | Plywood or OSB subfloor |
|---|---|---|
| Moisture | Verify concrete moisture limits and required vapor control | Investigate leaks, dampness, and moisture limits for wood substrates |
| Flatness | Patch low spots and correct high spots with suitable products | Secure loose panels and correct dips, ridges, or damaged sections |
| Surface condition | Check for cracks, contaminants, curing restrictions, and old adhesive | Check panel stability, squeaks, fasteners, and deflection |
| Underlayment | Use only the slab membrane/pad approved by your LVP maker | Use only an approved pad; extra cushioning may be prohibited |
A flat floor supports click-lock joints; it does not have to be perfectly horizontal. Structural movement, widespread slab moisture, or major subfloor damage should be resolved before laying decorative flooring.
Common Installation Mistakes—and How to Avoid Them
| Mistake | Likely problem | Better approach |
|---|---|---|
| Skipping flatness checks | Hollow spots, rocking, joint stress | Map and repair uneven areas first |
| Assuming waterproof LVP blocks moisture | Trapped moisture or damage below the floor | Test and address substrate moisture separately |
| Adding thick underlayment to attached-pad planks | Excess flex and joint damage | Check the approved flooring assembly |
| Failing to plan the last row | Narrow, awkward edge strips | Calculate row widths before starting |
| Ignoring expansion clearance | Buckling or peaking near walls and fixtures | Maintain product-specific gaps throughout |
| Repeating short-end joints | Distracting pattern or weak layout | Follow stagger and minimum-length rules |
| Forcing a misaligned lock | Chipped tongues and open seams | Remove, inspect, clean, and reseat the plank |
| Nailing trim into the flooring | Restricts a floating floor | Attach trim to fixed surfaces only |
What to Do if Planks Separate, Click, or Feel Uneven
Small gaps between boards: Inspect for debris, damaged locking edges, insufficient end-joint engagement, or movement caused by a poor subfloor. Do not fill an open click-lock joint with glue unless the manufacturer specifically directs it.
Clicking or hollow sounds: Some differences in sound are normal, but repeated clicking paired with movement can point to uneven support or an improperly seated joint. Check the installation tolerance rather than trying to hide the sound with extra padding.
Buckling at walls or doorways: Check whether spacers were removed, trim or cabinetry pins the planks, or expansion clearances are blocked. Temperature and moisture conditions may also play a role. Correct the underlying cause before replacing damaged boards.
A seam lifts or breaks: Stop work nearby. A broken locking profile usually needs replacement, not repeated tapping. Review the plank orientation and engagement sequence before restarting.
When Should You Hire a Flooring Professional?
Click-lock installation is approachable for a patient DIYer with a small, straightforward room. Professional help becomes more valuable when you encounter extensive concrete leveling, persistent moisture, structural subfloor issues, uncertain hazardous old materials, intricate multiroom transitions, or stairs. Stairs generally require special approved installation methods and nosings; do not treat them as an extension of a floating floor.
If you hire an installer, request a written scope covering old-floor removal, moisture testing, subfloor repairs, transitions, baseboards, material allowances, and labor warranty. These items can materially affect the job even when the plank-laying price looks attractive.
Frequently Asked Questions
Can you install vinyl plank flooring over tile?
Often, yes—if your exact product permits it and the tile is securely attached, clean, sufficiently flat, and free of unacceptable grout depressions or movement. Check height and door clearance before installing.
Do you need underlayment for vinyl plank flooring?
Not always. Many rigid-core click-lock products have attached padding, and additional soft underlayment may be prohibited. Concrete installations may have separate vapor-control requirements. Follow your specific product guide.
Does vinyl plank flooring have to acclimate for 48 hours?
No universal 48-hour rule applies. Some products require acclimation and others do not under normal conditions. Check the manufacturer’s storage, room-temperature, and acclimation requirements.
Can you install vinyl planks directly on concrete?
Yes, for products approved for concrete, once the slab meets the required surface, moisture, curing, and temperature conditions. Waterproof planks do not eliminate the need for concrete moisture checks.
Where should you start laying vinyl plank flooring?
Start on a wall that supports your planned direction and allows the locking profile to be assembled correctly. First calculate the widths of both edge rows and establish a straight reference line; the nearest corner is not always the best starting point.
How much expansion gap does vinyl plank flooring need?
Many products specify about 1/4 inch, but some require a different amount or larger clearances for certain room sizes or conditions. Use the gap specified for your particular flooring around walls and every fixed object.
Can you walk on vinyl plank flooring immediately after installation?
Many floating click-lock floors can be used soon after assembly, but follow the product’s post-installation instructions. Glue-down flooring may have adhesive curing and rolling requirements that delay foot traffic or furniture placement.
Should you install floating vinyl planks under kitchen cabinets?
Generally, do not install fixed, heavy cabinetry on top of a floating floor unless the flooring manufacturer expressly permits it. Cabinets and islands can pin the floor and prevent movement. Install around them with the prescribed clearance and finish detail.
Final Checklist
Before calling the project finished, confirm that every joint is seated, planks feel supported, expansion clearances are open, transitions are secure without pinning the floor, and trim is attached to fixed surfaces. Save extra planks and the product instructions for future repairs.
A successful installation is less about laying boards quickly and more about making the right decisions before the first row. Take time to flatten the subfloor, manage moisture, and check the layout. The result should look better, feel sturdier, and be easier to maintain.