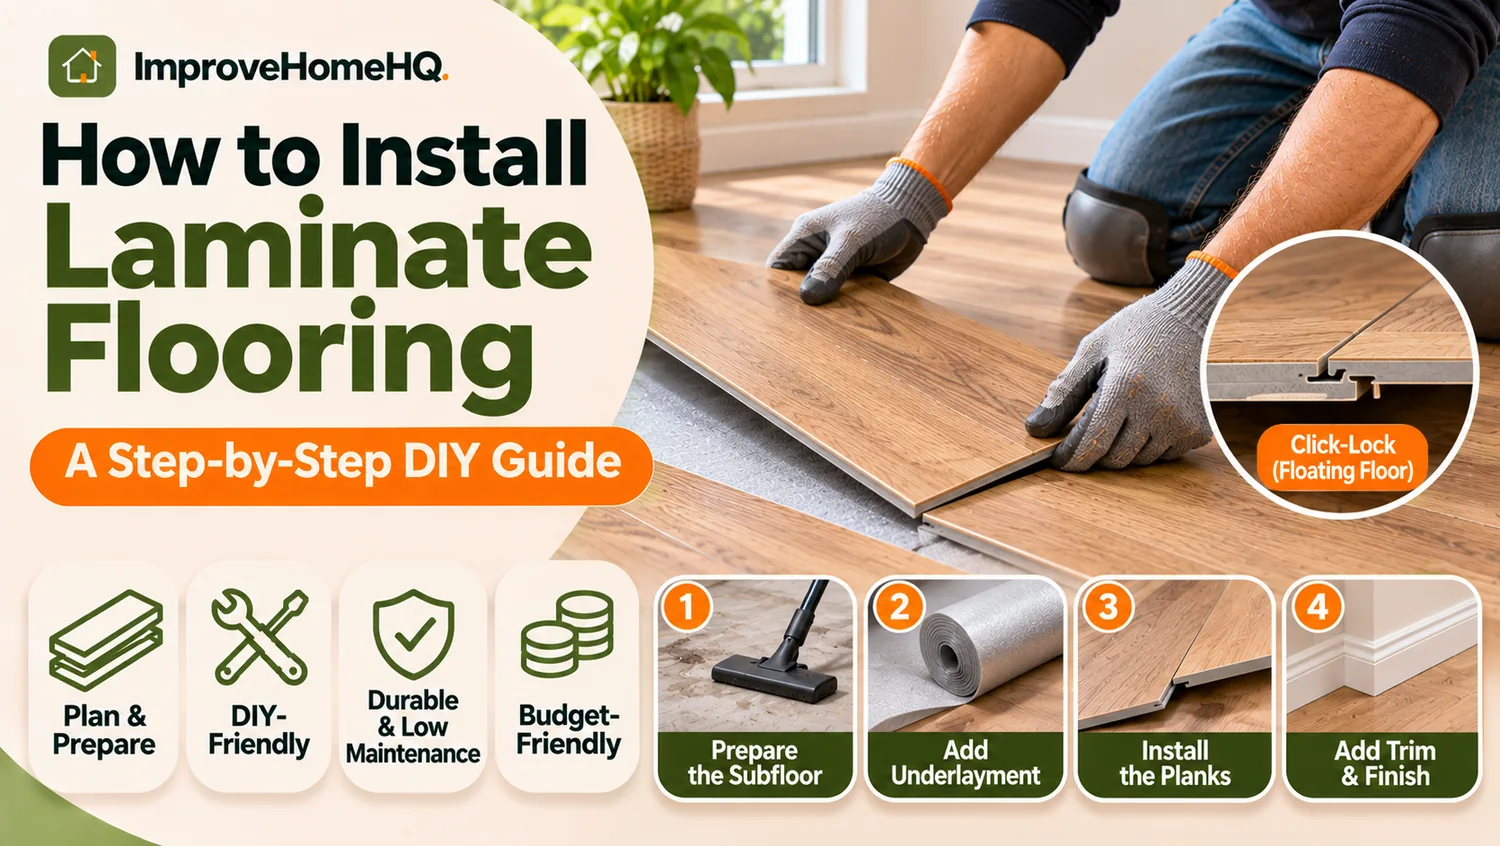
How to Install Laminate Flooring: A Step-by-Step DIY Guide
Quick answer: To install laminate flooring, prepare a clean, dry, flat subfloor; acclimate the planks if your product requires it; plan the first and last rows; and install the approved underlayment or moisture barrier. Start along a straight reference line, click the planks together, stagger the end joints, and leave the manufacturer’s expansion gap around walls and fixed objects. Finish with transitions and trim that do not pin the floating floor in place.
Click-lock laminate can give a bedroom, living room, or hallway a fresh wood-look surface without nails or adhesive. The tricky part isn’t snapping boards together. It’s checking the subfloor, planning the layout, and protecting the space the floor needs to expand and contract.
This guide focuses on typical floating, click-lock laminate flooring used in U.S. homes. Products differ, so the installation sheet packaged with your exact flooring takes priority over general measurements in any online guide.
Before You Start: Is Laminate a Good DIY Project?
A single rectangular room with a sound subfloor is a reasonable project for a careful beginner. Allow a day or two for installation and extra time for floor preparation, repairs, and any required acclimation. A hallway connecting several rooms, a stairway, or a room with extensive moisture damage is more complicated.
Laminate usually has a decorative wood-look layer over a wood-fiber core, protected by a wear layer. Most modern planks use click-lock edges and float over the subfloor rather than being attached to it. Not all laminate products are rated for the same conditions: verify whether yours is approved for basements, kitchens, bathrooms, radiant heat, or other specific uses.
Call a flooring professional if the subfloor is structurally unsound, persistently damp, significantly out of flat, or contains suspected asbestos materials that must be disturbed.
Tools and Materials You’ll Need
| Tools | Materials |
|---|---|
| Tape measure, pencil, straightedge or chalk line | Laminate planks plus cutting allowance |
| 6- to 10-foot straightedge or suitable level | Manufacturer-approved underlayment, if required |
| Spacers, tapping block and pull bar | Specified vapor retarder for concrete, if required |
| Rubber mallet | Subfloor patch or leveling compound, as appropriate |
| Miter saw, circular saw, jigsaw or laminate cutter | Transition strips and baseboard or shoe molding |
| Oscillating multi-tool or jamb saw | Manufacturer-approved seam tape or sealant, if applicable |
| Pry bar, utility knife, vacuum | Felt pads for furniture |
| Safety glasses, hearing protection, dust protection and knee pads | Replacement trim fasteners |
Choose a blade rated for laminate and follow the tool manufacturer’s instructions on which face should be up during cutting. Use appropriate dust collection and respiratory protection, especially when sawing indoors. Never cut a plank while holding it in your hand.
How Much Flooring Should You Buy?
Measure each rectangular section in feet and multiply length by width. Add the areas of alcoves or adjoining spaces, then allow roughly 10% extra for cuts, selection and mistakes. Rooms with many angles or a complex layout may need more. Round up to whole cartons.
Example: A 12-by-15-foot room contains 180 square feet. With 10% extra, buy at least 198 square feet, rounded up to the next full carton. Check the square-foot coverage listed on your packaging.
Keep an unopened carton or a few spare planks for repairs if your budget permits; the same finish may be difficult to match years later.
How to Install Laminate Flooring: 9 Steps
Step 1: Check the Product Instructions and Room Conditions
Before removing anything, locate the installation guide for your exact brand and product line. It should state:
- Required temperature, humidity, and acclimation conditions.
- Maximum permitted subfloor unevenness and moisture limits.
- Whether the attached pad is sufficient and which moisture barrier is required.
- Minimum wall gaps, starter-piece lengths, and end-joint offsets.
- Maximum continuous floor dimensions and doorway transition requirements.
- Any special procedure for wet-area perimeter sealing.
Do not assume every laminate must sit in the room for exactly 24 or 48 hours. Some products specify a 48-hour period; other instructions make acclimation conditional on the storage and installation conditions. Keep the boxes unopened and arranged as instructed if acclimation is required.
For a concrete example, the Pergo Pro installation instructions specify a controlled indoor environment and give detailed requirements for flatness, moisture, barriers, and transitions. Those figures are examples for that product, not universal laminate specifications.
Step 2: Remove Trim and Inspect the Existing Floor
Empty the room. Remove shoe molding or quarter-round, and remove baseboards if you want the cleanest finish. Score any caulk lines first and use a scrap block behind your pry bar to protect the wall. Label trim pieces for reinstallation.
Remove carpet and padding. Existing tile, sheet vinyl, or other hard flooring may sometimes remain if it is stable, dry, flat, and specifically allowed by your laminate manufacturer. Do not install over a soft or cushioned floor that permits excessive movement.
Older-floor safety: Some older vinyl tiles, sheet-floor backing, and adhesives can contain asbestos. Do not sand, grind, saw, or scrape suspected asbestos materials. The U.S. Environmental Protection Agency’s homeowner guidance advises leaving intact materials undisturbed and using qualified professionals when work would disturb them.
Look for loose panels, rot, swollen edges, squeaks, protruding fasteners, cracks, and evidence of water intrusion. Address the cause of moisture before covering the floor.
Step 3: Make the Subfloor Flat, Dry, Clean and Solid
Flat is not the same as level. A floor may slope slightly across a room yet be sufficiently flat for laminate. Humps and dips are the bigger problem because they make planks flex and stress their locking joints.
Lay a long straightedge across the floor in several directions. Mark high and low spots. Follow your product’s flatness tolerance: for example, Pergo Pro specifies no more than 3/16 inch of unevenness over 10 feet. Another product may require a different tolerance.
- Wood subfloor: Secure loose panels, replace damaged material, set fasteners flush and correct dips with products approved for wood substrates.
- Concrete subfloor: Repair cracks or low spots using a compatible patching or leveling product. Follow its curing and moisture requirements before covering it.
- Either type: Remove debris, vacuum thoroughly and check moisture using the testing method and limit specified by the flooring manufacturer.
Do not rely on thick foam underlayment to hide major dips. It cannot repair a failing or badly uneven subfloor. If the floor feels bouncy or unstable, repair that condition before installing the laminate.
Step 4: Plan the Direction, Starting Wall and Final Row
In a simple room, planks are often installed parallel to the longest visual line or the main sightline. But the best starting point is the one that lets you keep the rows straight and avoid awkward narrow cuts. A crooked wall is not a reliable guide.
For multi-room layouts, plan the hallway and doorways before placing the first board. You may use the hallway to establish a straight reference line, then physically start in a room that allows the locking system to assemble in its preferred direction. Check whether your product requires T-moldings at certain doorways or maximum run lengths; do not assume a continuous installation through every room is permitted.
Calculate the edge-row widths:
- Measure the room width perpendicular to the direction the planks will run.
- Subtract the specified expansion gaps at both walls.
- Divide the usable width by the plank’s exposed width.
- Check the width left for the final row. If it will be an impractically narrow strip, rip the first row narrower so the first and last rows are more balanced.
For example, if the usable room width is 119 inches and the planks are 7 inches wide, 17 full plank widths would exactly fill it. If the usable width instead creates a 1-inch final strip, reduce the width of the first row and recalculate. Check the product’s minimum acceptable plank width.
Snap a straight reference line parallel to the intended first row. If the wall bows, trim the wall-facing edge of the first row as necessary while preserving the expansion gap.
Step 5: Undercut Door Jambs and Prepare Obstacles
Place a scrap plank on top of the required underlayment beside the door casing. Use the combined height to guide an oscillating saw or jamb saw when trimming the casing so the laminate can slide underneath.
A professional-looking fit should conceal the perimeter space without trapping the floor. Even beneath jambs, the flooring needs the concealed movement gap specified by the manufacturer.
Plan cuts around floor vents, columns and pipes. Where the design allows a cutout, mark the obstruction carefully and leave the required clearance. Use an approved trim ring or escutcheon to hide a pipe gap. Never drive screws through the floating planks to attach a fixture.
Step 6: Install the Correct Underlayment or Moisture Barrier
Underlayment can reduce minor sound transmission and provide the support specified for the plank system. A vapor retarder serves a different purpose: limiting moisture vapor reaching the laminate from the substrate.
Do not automatically add a second foam pad beneath planks with attached padding. Many products prohibit it because excessive cushioning can damage the click-lock joints.
For concrete, follow the specified vapor-barrier system even when the plank has an attached pad. For example, Pergo Pro calls for a 6-mil polyethylene vapor barrier over concrete with seams overlapped by at least 8 inches. An attached pad does not necessarily replace that requirement.
If separate underlayment is required, unroll it as directed, lay its seams without unintended overlap, and use the prescribed seam tape. Some underlayments integrate a moisture barrier with special flaps or overlap instructions; follow those rather than a generic butt-joint method. Do not use plastic sheeting over a wood subfloor unless your flooring system specifically calls for it.
Step 7: Lay the First Two Rows Carefully
Set spacers along the starting wall to maintain your product’s expansion gap. Many common products call for approximately 3/8 inch, but some require a different size. The gap applies to all perimeter walls and fixed obstructions, not just the starting wall.
Set the first plank in the starting corner, orienting its tongue and groove as the manufacturer directs. Connect the next plank at its short end and continue across the first row. Cut the last plank to fit while keeping the wall gap.
Before cutting, subtract the expansion gap from your measurement. Measure from the last installed plank to the wall, then mark the cut on the correct end so the factory locking profile remains on the side that must connect.
Start the second row with a plank length that gives the required end-joint offset. Angle the long edge into the first row and lower or tap it into position exactly as the locking system requires. Some systems connect one plank at a time; others work better when a whole row is assembled first.
Check that the first two rows are straight, firmly engaged and evenly spaced. Small errors here multiply as you work across the room.
Step 8: Continue Installing and Stagger the Seams
Work row by row, checking each joint before moving on. A properly engaged joint should sit flush without a visible gap or raised corner. Use a manufacturer-approved tapping block only where the locking instructions allow it; striking a delicate tongue directly can break it.
How to stagger laminate flooring: Offset the short-end joints between adjacent rows by at least the distance in your product guide. Twelve inches is a common recommendation, but not a universal rule. Avoid a repeated stair-step pattern or four corners meeting together.
Cutoffs can reduce waste, but only if the remaining piece has the correct factory connector on the edge that needs to join the row. A piece with a cut-off tongue or groove cannot be inserted in the middle of a click-lock field as though the original profile were still present. Save suitable pieces for row starts or ends and discard those that do not meet the minimum length.
Alternate among several cartons to distribute similar printed patterns and color variations. Vacuum chips and sawdust as you go, especially from the joints.
Cutting tip: Use a miter saw or flooring cutter for crosscuts, a table or circular saw for long rip cuts, and a jigsaw for irregular shapes. Support the plank securely and account for blade kerf. The best finished-side orientation depends on the saw and blade, so test on a scrap piece first.
Step 9: Fit the Last Row and Finish the Edges
The last row often needs to be ripped lengthwise. Measure the space at several points because the finishing wall may not be perfectly straight. Subtract the required expansion gap and transfer the measurements to each plank.
Use a pull bar where there is too little room to engage the last row by hand, but protect the board and avoid excessive force. Remove all temporary spacers once the floor is assembled.
Install the baseboards or shoe molding into the wall or existing baseboard, not through the laminate. The trim should cover the expansion gap without tightly pinching the floor. Install approved transition moldings at doorways and changes in floor height, leaving clearance under the profile as required.
If the flooring manufacturer specifies special water-resistant perimeter detailing, follow that exact system. Some wet-area instructions call for compressible backer rod and flexible silicone at particular edges. Do not assume sealing every expansion gap with caulk is acceptable on every laminate floor; an ordinary floating floor must still be able to move.
How to Handle Tricky Areas
Doorways and Transitions
Measure the opening and the position of the transition track before cutting the last boards. A doorway might need a T-molding even when both rooms have the same flooring. For instance, Pergo Pro identifies doorway and continuous-run limits that trigger transitions. Check your model’s limits rather than copying the approach from a different brand.
Kitchens and Heavy Cabinets
Install permanent cabinets and heavy kitchen islands first when required by your floor’s instructions, then leave movement space around them. Building fixed cabinets over a floating laminate floor can prevent movement and cause buckling. Check the clearance needed for appliance removal and dishwasher access before raising the finished-floor height.
Pipes and Irregular Cuts
For a pipe, mark the center and required clearance, drill an appropriately sized hole, then make an access cut if necessary. Reattach a small cover piece only using the joint or repair technique approved by the manufacturer. A trim collar can conceal the opening. Keep the floor free to move around the pipe.
Stairs
Stairs generally require a different, manufacturer-approved attachment method and stair-nosing system. Do not treat them as an extension of a floating floor. If your exact laminate collection is not rated for stair installation, choose another approved product.
Common Laminate Flooring Installation Mistakes
| Mistake | Why it causes problems | Better approach |
|---|---|---|
| Skipping the flatness check | Planks flex and locking edges separate | Check with a long straightedge and repair high or low spots |
| Covering moisture problems | Core swelling, odors and damage can follow | Correct leaks and meet the product’s moisture limits |
| Adding extra foam beneath attached pads | Too much movement can stress joints | Use only approved underlayment layers |
| Forgetting wall gaps | Expansion can create peaking or buckling | Maintain the specified gap everywhere |
| Using tiny starter pieces | Weak or awkward end-joint layouts | Follow minimum lengths and joint-offset requirements |
| Hammering a click profile directly | Tongues and grooves can chip or break | Use the recommended assembly method and tapping block |
| Fastening trim through planks | The floating floor becomes pinned | Fasten trim to the wall or approved substrate |
| Assuming every waterproof claim allows any room | Product warranties may limit use or specify edge sealing | Check the exact product’s room and moisture approvals |
Troubleshooting After Installation
A seam will not close: Stop and inspect the tongue and groove for debris, a broken lip, or incorrect assembly angle. Do not force the plank flat with heavy hammer blows. Remove and reconnect it using the approved method.
A board rocks or dips underfoot: Check whether the subfloor was insufficiently flat or the underlayment is too soft. Trim will not fix an underlying support problem; the affected section may need to be lifted and the substrate corrected.
The floor buckles near a wall or doorway: Check for insufficient expansion clearance, a molding or cabinet that pins the floor, excessive room dimensions without transitions, or moisture. Identify and correct the cause rather than simply adding weight to flatten the boards.
An edge swells after a spill: Dry the surface promptly and inspect the manufacturer’s care guidance. Swollen fiber-core material may not return to its original shape and can require plank replacement.
Frequently Asked Questions
Where should you start laying laminate flooring?
Start at a wall and in a direction that suits the plank’s locking system, but establish the layout from the room’s straightest reference line rather than trusting a crooked wall. For connected rooms, plan the main hallway and transitions before deciding where to physically begin.
Can you install laminate flooring over concrete?
Yes, if the product is approved for concrete and the slab meets its moisture, flatness and condition requirements. Many systems require a separate 6-mil polyethylene vapor barrier, even with attached underlayment. Always check the specific installation guide.
Can laminate flooring go over tile or vinyl?
Sometimes. The existing surface must be stable, flat, dry, and permitted by the manufacturer. Loose tile, soft flooring, moisture damage and excessive height changes must be addressed. Do not disturb old materials suspected of containing asbestos.
Do you need underlayment if the planks have padding attached?
Usually you should not add another cushioning layer unless the manufacturer allows it. A separately required moisture barrier is not the same as adding another soft pad; check the specifications for your subfloor.
How much space should you leave around laminate flooring?
Many floating products specify approximately a 3/8-inch perimeter gap, but the correct figure comes from the instructions for your exact planks. Preserve the gap around walls, door casings, columns and other fixed objects, and conceal it with appropriate trim.
How far apart should plank end joints be?
Follow the minimum offset in the manufacturer’s instructions. A 12-inch stagger is common, but some systems use other values. Avoid lining up end joints in consecutive rows or repeating the same offset throughout the room.
Can you walk on laminate flooring immediately after installation?
Many floating click-lock systems can be walked on once the planks are fully locked and the installation is complete. However, observe any product-specific restrictions, especially for sealants, adhesives, stair components or transitions that need time to cure.
Can you install laminate in a bathroom or basement?
Only when the exact product is approved for that location and all moisture-control and edge-treatment requirements are met. A water-resistant surface does not make a damp subfloor safe. Rooms with floor drains or recurring standing water are prohibited for some laminate systems.
Final Checks Before Moving Furniture Back
Walk the room and inspect each row for open joints or raised corners. Confirm that spacers are removed, all perimeter and transition clearances remain free, and molding is secured without pinning the planks. Vacuum with a hard-floor attachment, follow the manufacturer’s cleaning instructions, and put felt protectors under furniture legs.
A durable laminate installation starts beneath the visible surface. A flat, dry subfloor, a well-planned first row, and correctly sized expansion spaces matter more than how quickly the boards click together. Follow the requirements for the flooring you actually purchased, and the finished room will look cleaner and be easier to maintain.