Garage Door Roller Replacement: How to Choose Rollers, Replace Them Safely, and Know When to Call a Pro
A garage door that rattles, squeaks, or jerks along its tracks may have worn rollers. Replacing them can make the door move more smoothly, but it is not automatically a simple DIY project. The safest approach depends on which roller is damaged, how it is mounted, and whether the door itself is in good condition.
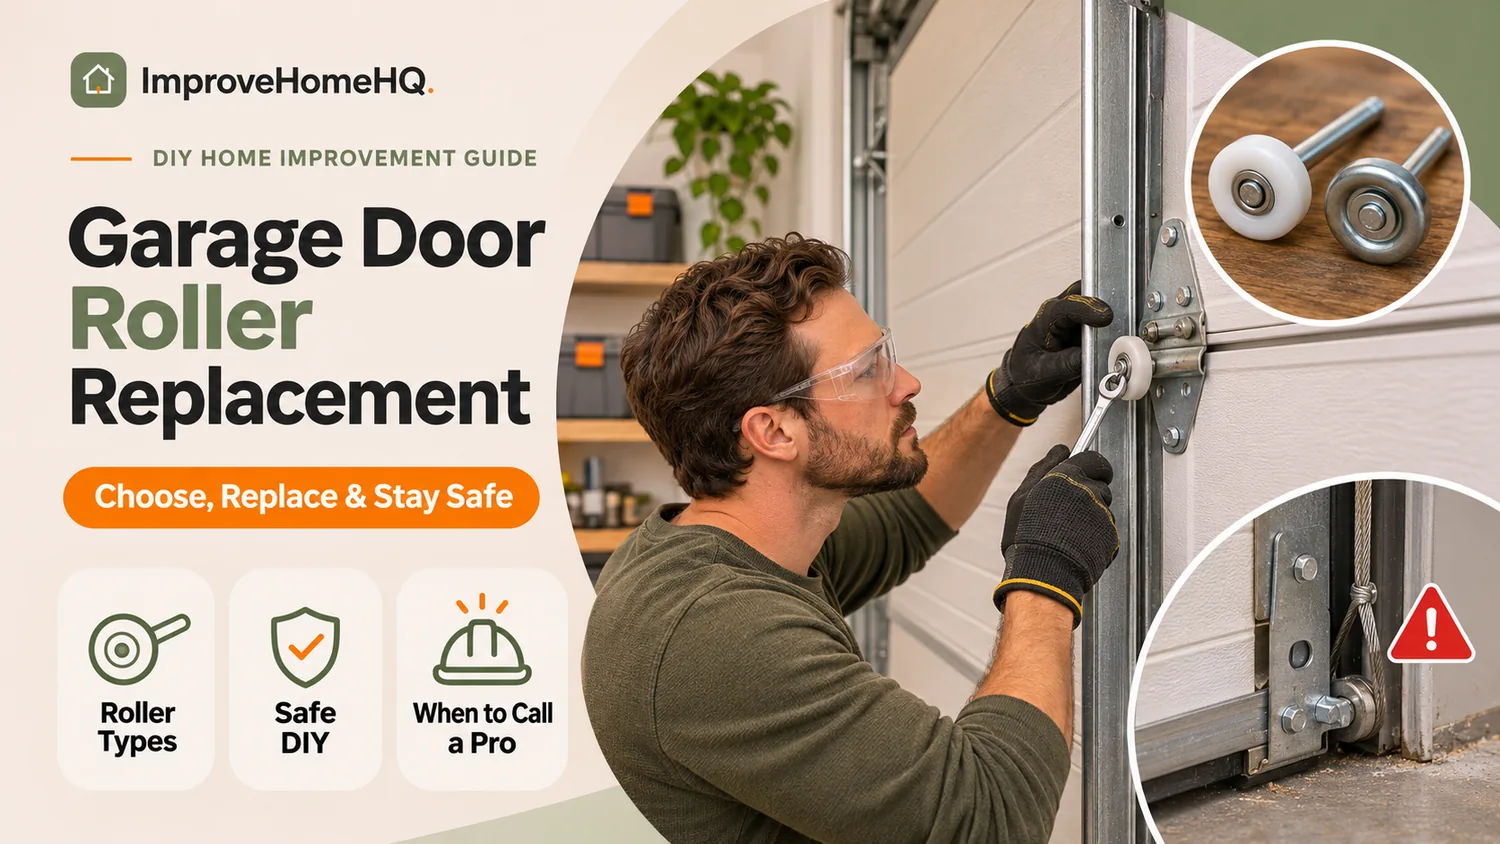
For a typical sectional residential garage door, some middle rollers can be replaced through their hinges using the door manufacturer’s approved procedure. Bottom rollers require particular caution: their brackets also anchor lift cables connected to the spring system. Never loosen or remove a bottom bracket or its cable to change a roller. If the repair would require bending a track, moving a cable, or disturbing spring-loaded hardware, hire a garage door technician.
This guide explains how to identify worn rollers, select compatible replacements, assess whether a repair is suitable for DIY, and check the door afterward.
Garage Door Roller Replacement at a Glance
| Question | Practical answer |
|---|---|
| What do rollers do? | Their wheels move through the metal tracks while their stems connect to the door’s hinges or brackets. |
| Can you change them yourself? | Some middle rollers may be DIY-serviceable only when the door’s manufacturer permits it and the door can be secured. |
| Which rollers are high-risk? | Bottom rollers and any roller whose removal requires disturbing lift cables, springs, or special brackets. Top fixtures may also require model-specific adjustments. |
| How many will you need? | Count the rollers on your actual door; many residential doors have roughly 10–12, but configurations vary. |
| Best upgrade for noise? | Properly sized nylon-tread rollers with suitable bearings are often quieter than basic metal wheels. |
| Typical professional price? | A 2026 U.S. cost guide estimates roughly 150–250 for parts and labor, though quotes vary by location and job. |
How Garage Door Rollers Work
On a sectional overhead door, each roller has a wheel that travels inside the track and a steel stem held by a hinge or bracket. The tracks guide the door vertically, around the curved transition, and along the ceiling when open. Rollers do not lift the weight of the door by themselves; the counterbalance springs and cables are essential to that operation.
The roller’s position matters:
- Middle or side rollers sit in end hinges between door sections. The hinge attaches sections and accommodates their movement around the track curve.
- Top rollers sit in adjustable or fixed top fixtures. Their position can affect how the upper panel meets the opening.
- Bottom rollers fit into bottom corner fixtures, which commonly also secure the lift cables. Those fixtures are part of a high-tension assembly.
This is why an instruction that works for one hinge location should not be applied indiscriminately to every roller.
Signs Your Garage Door Rollers Need Replacing
Check for several symptoms rather than assuming that any garage-door noise comes from the rollers.
Visible wheel or stem damage
A cracked nylon wheel, flat spot, bent stem, missing bearing components, or wheel that wobbles noticeably is a strong sign of trouble. With the door completely stopped, inspect from a safe position using a flashlight. Do not put fingers between sections or inside the tracks.
Grinding, rumbling, or jerky travel
Rough bearings may cause grinding or rumbling as the door moves. A wheel that no longer rotates freely can skid or chatter. Jerky movement can also result from bent tracks, damaged hinges, cable problems, or a door that is out of balance, so noise alone is not a diagnosis.
Rust and excessive looseness
Surface rust on a steel wheel does not always mean immediate failure, but advanced corrosion, rough rotation, or a worn stem and hinge opening justify inspection. If multiple rollers show damage, a full-set replacement may make more sense than replacing only one.
A roller outside the track
Stop using the door. A derailed roller can indicate track damage, a broken hinge, or loss of proper door alignment. Do not try to pull a loaded door section back into the track or operate the opener to force it into position.
Quick diagnostic tip: With the door stationary, look at both tracks, the hinge fasteners, rollers, and visible cables. If a lift cable is frayed or slack, a spring is broken, or the door looks crooked, stop the inspection and call a qualified technician.
Which Replacement Rollers Should You Buy?
Rollers are not universally interchangeable. Select parts based on your door manufacturer’s requirements and the dimensions of the existing hardware.
Nylon vs. steel rollers
| Type | Main advantages | Trade-offs |
|---|---|---|
| Nylon-tread rollers with bearings | Generally quieter, smooth operation, often a good residential upgrade | Wheel and bearing quality vary; must match the door’s load requirements |
| Basic nylon or plastic rollers without bearings | Usually inexpensive and relatively quiet when new | Can wear faster or roll less smoothly under frequent use |
| Steel rollers with bearings | Durable option when specified for the door and its operating conditions | Often noisier; exposed metal components can corrode |
A bearing count alone does not prove quality. A well-made roller with the correct load rating, dimensions, and bearing protection matters more than a marketing claim about a particular number of balls.
Measure the wheel and stem—not just the track label
Before ordering, check:
- Wheel diameter. Many residential doors use tracks commonly described as 2-inch tracks, but the actual roller wheel is not necessarily exactly 2 inches across. Match the existing roller or the manufacturer’s specification.
- Stem length and diameter. Check both dimensions. A longer stem is not automatically an upgrade; it must fit the existing hinge or fixture.
- Wheel material, bearing style, and load rating. Heavy, insulated, wood, or specialty doors may require specific hardware.
- Quantity and door layout. Count every roller rather than relying on a kit advertised for a particular door height.
- Door manufacturer and model. Brands such as Clopay, Amarr, and Wayne Dalton can use different hardware designs. Some proprietary track or fixture systems require model-specific components.
If identifying the roller requires removing a high-risk bracket, do not remove it for measurement. Take clear photographs of accessible hardware and consult the manufacturer or a door-parts professional.
Is Replacing Garage Door Rollers a Safe DIY Job?
Only sometimes. The key question is not whether a tutorial shows a quick method; it is whether the specific door manufacturer approves the procedure and whether the work can be done without disturbing loaded components.
Repairs that may be suitable for a capable homeowner
A manufacturer-approved replacement of an accessible middle roller or hinge may be reasonable when the door is intact, fully closed, secured against movement, and the replacement does not require bending track or loosening high-tension hardware. Some manufacturers recommend professional service even for hinges, so the owner’s manual controls.
Repairs to leave to a trained technician
Call a professional for:
- Any bottom-roller job involving the cable anchor or bottom corner fixture.
- Broken, frayed, or loose lifting cables; damaged or broken springs; or a door that will not stay properly balanced.
- Rollers that have jumped out of the track, bent tracks, distorted brackets, or a visibly crooked door.
- Top-roller or top-fixture adjustments without a manufacturer-approved service procedure.
- Commercial, unusually heavy, high-lift, or unfamiliar proprietary door systems.
Clopay explicitly warns against removing bottom brackets while a door is under spring tension and advises professional attention for damaged track or hinge components. Amarr likewise warns against adjusting or repairing springs, bottom corner brackets, cables, and related tension-bearing parts. These warnings take precedence over internet shortcuts.
Never: loosen a bottom-corner bracket, detach a lift cable, adjust a torsion spring, remove spring anchor hardware, or use the opener to force a binding door.
Tools and Supplies for a Manufacturer-Approved Middle-Roller Repair
If your door manual explicitly permits replacing an individual middle roller, the usual supplies include:
- Correct replacement rollers or manufacturer-specified hinge-and-roller assemblies
- Safety glasses and sturdy work gloves
- Flashlight
- Proper screwdriver, socket, or nut driver for the hinge fasteners
- Stable step ladder if the permitted work is above comfortable reach
- Door manufacturer’s service instructions
- A helper to keep bystanders away and observe the work area, if the procedure calls for one
Some manufacturer procedures may specify door-restraint devices. Use only the exact method they prescribe; clamping a track in the wrong place or relying on a clamp as support for a raised door can create additional danger.
Do not plan to use a hammer or pliers to deform the track as a general replacement technique. Track reshaping can alter the door’s alignment and may conflict with manufacturer instructions.
How to Replace a Garage Door Roller: A Safety-First Procedure
The following is a decision-guided overview for an ordinary, manufacturer-approved middle-hinge replacement, not a universal set of disassembly instructions. Follow your particular door’s written service procedure for fastener locations, order of operations, and required restraints.
Step 1: Identify the exact roller and check the manual
Confirm that the worn roller is in a middle end hinge, not the bottom cable bracket or upper adjustment fixture. Locate the brand and model information and obtain the correct service instructions. If the manual says to use a trained technician, do not proceed with DIY replacement.
Inspect the nearby track, hinge, panel edge, and cable path. A bent hinge or damaged panel may call for more than a roller swap.
Step 2: Close the door and prevent accidental operation
A complete repair should begin with the door fully closed, resting on the floor and in a stable condition. Keep people, pets, and vehicles clear of the opening. Disconnect electrical power to the opener to prevent accidental activation.
If the manufacturer’s procedure requires disconnecting the trolley from the opener, follow the opener’s own manual and do so with the door closed. Never release the opener from a raised door you suspect is unbalanced; it may fall unexpectedly.
Step 3: Confirm that the hinge can be serviced independently
Compare the actual hinge arrangement with the approved instructions. Some designs allow a single end hinge or roller to be serviced without removing other hinges or affecting cable attachments. Others do not.
Do not remove multiple hinges at once. Hinges help connect and align door sections. If accessing the wheel would require prying a panel outward, flexing the track, or moving any cable or loaded bracket, stop and arrange professional service.
Step 4: Replace only the permitted component
Use the manufacturer’s documented sequence to remove the approved hinge or roller assembly and fit the compatible part. Keep all other hinges, brackets, and cable attachments untouched.
The new roller should sit properly in its hinge bore and track without forced bending, scraping, or an obviously angled stem. Use the correct replacement fasteners and specified tightening method. Do not enlarge holes or substitute screws without approval.
Step 5: Recheck the hinge, wheel, and track
Before restoring power, make sure the serviced hinge is attached as specified, its fasteners are secure, and the roller is correctly located. Inspect both sides for loose hardware, contact with the track edge, or a roller that is not seated as designed.
If anything looks distorted or does not fit naturally, do not operate the door. Have a technician correct the issue.
Step 6: Test operation without forcing the door
Follow the manufacturer and opener instructions for a post-repair test. Reconnect the opener only after all tools and restraints are removed, the work area is clear, and the door is confirmed safe to operate.
Watch and listen through a controlled open-and-close cycle from a safe distance. The door should travel evenly without binding, jumping, grinding, or excessive vibration. If the door hesitates, looks crooked, or reverses unexpectedly, stop using it and request service. Also verify the opener’s safety-reversal and photo-eye functions in accordance with its manual.
Why Bottom Roller Replacement Is Different
The bottom roller is attached to a bottom fixture that commonly anchors a lift cable. That cable connects into the spring-powered counterbalance system. Loosening the wrong fastener can release stored force or allow the door to become unstable.
Some online tutorials describe pulling the bottom section away from the track, bending the track to remove a wheel, or temporarily taking down track sections. Those methods are not universal manufacturer-approved instructions. They can be especially hazardous when a door is heavy, damaged, or improperly balanced.
For most homeowners, the responsible choice is to have a trained garage door technician replace bottom rollers. Ask the technician to check the cable attachment, lower brackets, track condition, and door balance during the same visit. You do not need to touch or loosen the cable attachment to inspect it visually from a safe distance.
How Much Does Roller Replacement Cost?
As a budgeting reference, Angi’s October 2026 U.S. cost guide places a typical professional roller replacement around 150–250, with an average near $200. That is an estimate, not a fixed national price; your actual quote may reflect the number of rollers, special hardware, local labor rates, service-call minimums, and whether damaged hinges or tracks also need repair.
DIY material costs may be lower, but only count those savings for a replacement your manufacturer explicitly permits you to perform. Paying for professional installation is particularly worthwhile if the bottom brackets, tracks, springs, or cables are involved.
When requesting a quote, ask whether it includes the number and type of rollers, labor, any new hinges, an inspection of the door’s balance, and the company’s parts and workmanship warranty.
Mistakes That Can Turn a Small Repair Into a Bigger Problem
Bending the tracks to get rollers out
A visibly flexible track is not necessarily designed to be bent and re-formed. Even small changes may create pinch points, rough travel, or misalignment. Leave track removal and straightening to the appropriate professional procedure.
Taking off the bottom bracket
This is the most consequential mistake. Bottom-corner fixtures can anchor tensioned lifting cables. Do not remove their mounting bolts even if they resemble ordinary hinge screws.
Buying a roller based only on its advertised diameter
Wheel diameter, stem dimensions, load capacity, and door compatibility all matter. A roller that almost fits may still bind or wear hinges and tracks prematurely.
Treating lubrication as a cure for damaged hardware
Lubricant cannot repair cracked wheels, loose bearings, a crooked track, or a failing spring. Diagnose the cause first.
Ignoring other sources of noise
Hinges, the opener rail or drive, loose support hardware, and track problems can generate sounds that resemble failing rollers. Replacing every roller may not fix a separate mechanical issue.
How to Maintain New Rollers
- Inspect periodically. Look for chipped wheels, bearing wear, corrosion, loose hinge fasteners, frayed cables, and visible track damage while the door is stationary.
- Follow the door manufacturer’s lubrication instructions. Some rollers have serviceable metal bearings; others are sealed. Do not lubricate nylon or plastic wheel surfaces. Amarr advises against lubricating plastic rollers and bearings, while its maintenance materials address lubrication of appropriate metal moving parts.
- Keep the tracks clear of loose debris. Wipe accessible dirt gently with the door stopped; avoid packing the tracks with grease.
- Arrange professional service for unusual movement. A door that begins pulling sideways, dropping unexpectedly, or binding may have a counterbalance or alignment problem.
- Test opener safety features. Follow the opener manual’s schedule and procedure for photo-eye and reversal tests. Do not bypass safety devices to make the door close.
There is no universal replacement interval for every roller. Use visible wear, operation, manufacturer guidance, and actual duty cycle to decide when service is needed rather than replacing parts solely because a set number of years has passed.
Frequently Asked Questions
Can I replace garage door rollers myself?
You may be able to replace certain middle rollers if the door manufacturer approves the procedure and the door is undamaged and securely closed. Bottom rollers, cable-connected fixtures, spring-related work, and damaged or misaligned tracks should be handled by a trained professional.
Can I replace a garage door roller without removing the hinge?
It depends on the door and hinge design. Some products have manufacturer-specific service methods, but forcing the roller out by bending the track or prying the door section is not a safe universal shortcut. Check the service instructions for your model.
Do I need to replace all the rollers at once?
Not always. A single damaged roller can be replaced if the rest of the system is in good condition and the manufacturer approves the repair. If multiple wheels have similar wear, changing the complete compatible set may reduce repeated service visits.
Are nylon rollers quieter than steel rollers?
Often, yes—particularly well-made nylon-tread rollers with bearings compared with basic metal wheels. Actual noise also depends on hinge condition, track alignment, door construction, and the opener.
Can bad rollers damage a garage door opener?
Worn or seized rollers can increase resistance and strain the system, but an opener problem is not proof that the rollers are at fault. Do not increase the opener’s force setting to push through a binding door. Have the underlying mechanical fault diagnosed.
Should you grease garage door tracks?
Generally, no. Thick grease inside the track can attract dirt and does not correct damaged rollers or bad alignment. Follow the door maker’s maintenance instructions and lubricate only the recommended moving parts.
How long does the job take?
A technician may complete a straightforward roller replacement in roughly an hour or two, but timing varies with the door’s hardware and condition. A difficult bottom bracket, damaged hinge, or track issue can extend the visit. Prioritize a correct repair over speed.
What if the garage door is still loud after replacing the rollers?
Look for other possible sources: damaged hinges, track brackets, opener drive components, or a door that is not moving evenly. If the door binds, feels abnormally heavy, or has cable or spring damage, stop operating it and contact a professional.
The Bottom Line
Worn rollers can make an otherwise functional garage door noisy and uneven. The right fix begins with identifying the damaged part, matching its dimensions and load requirements, and separating a permitted middle-roller repair from the much riskier bottom-bracket and cable system.
For a straightforward, manufacturer-approved repair, careful preparation and a proper post-repair inspection matter more than a quick shortcut. When the work involves the bottom fixture, track manipulation, tensioned cables, or uncertain hardware, professional service is the safer investment.
Sources and Further Reading
- Clopay — Service and Replacement Parts Guide — manufacturer recommendations on hinges, tracks, and bottom brackets.
- Amarr — Care & Maintenance — visual inspections, lubricating appropriate components, and safety guidance.
- Amarr — Garage Door FAQs — warnings about spring tension and high-tension fasteners.
- DDM Garage Doors — Bottom Roller Replacement — specialist illustration of why bottom roller work requires exceptional care; not a substitute for your own door’s manufacturer instructions.
- Moving Up Garage Doors — How to Replace Garage Door Rollers — roller configurations and buyer considerations; methods should be checked against the manufacturer’s instructions.
- Angi — Garage Door Roller Replacement Cost (updated October 6, 2026) — U.S. price estimates.