Best Paint for Kitchen Cabinets: 6 Options for a Smooth, Durable Finish
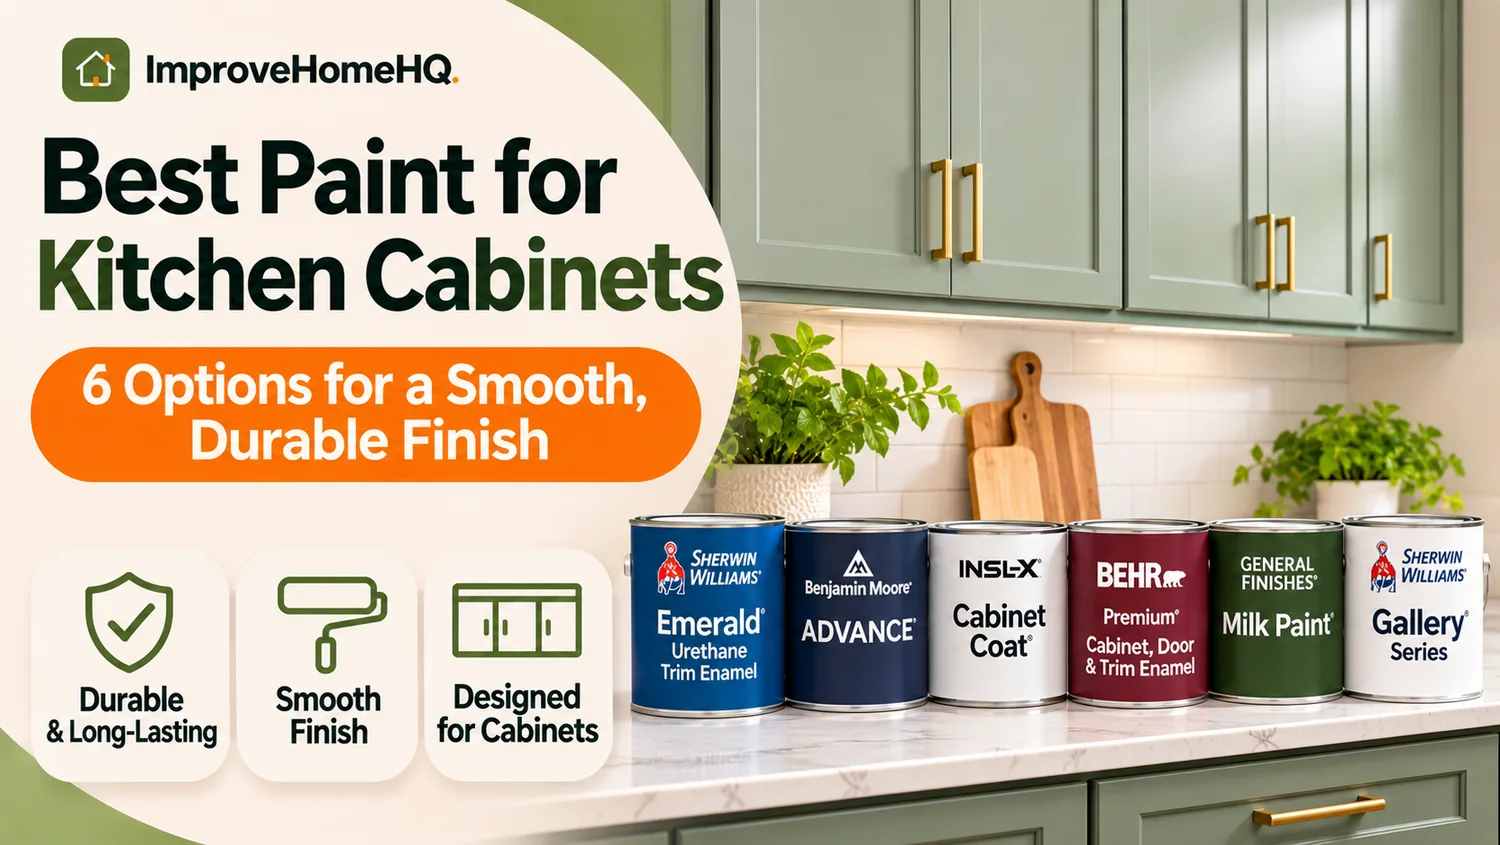
Quick answer: The best paint for kitchen cabinets for many DIY projects is a cabinet-grade enamel that levels smoothly and withstands frequent handling. Sherwin-Williams Emerald Urethane Trim Enamel is a strong all-around choice for busy kitchens; Benjamin Moore Advance is particularly appealing for a smooth brushed or rolled finish if you can accommodate its longer recoat time. INSL-X Cabinet Coat and Behr Premium Cabinet, Door & Trim Enamel are alternatives worth comparing. Choose the product only after checking your cabinet material, existing finish, primer requirements, and drying schedule.
Painting cabinets can change the look of a kitchen without replacing the boxes and doors. But cabinet doors take more punishment than a typical painted wall: fingers pull at edges, drawers rub against frames, and cooking oils collect around handles. A pretty finish on day one is not enough.
The right coating matters, but preparation and patience matter just as much. Here is how to pick a paint that suits your kitchen, compare the leading options, and avoid the problems that cause fresh cabinet finishes to chip or stick.
Best Paint for Kitchen Cabinets: Top Picks Compared
| Paint | Coating type | Best fit | What to know |
|---|---|---|---|
| Sherwin-Williams Emerald Urethane Trim Enamel | Water-based, urethane-modified alkyd enamel | All-around durability and frequently used doors | Levels well; formulated for cabinet and trim use; check the current label for recoat instructions. |
| Benjamin Moore Advance | Waterborne alkyd | Brushing or rolling for a smooth-looking finish | Extended working time; manufacturer lists 16 hours between coats for the satin product. |
| INSL-X Cabinet Coat | Waterborne urethane-acrylic enamel | Previously finished cabinetry and trim | Designed for adhesion and a durable finish; surface condition still determines prep. |
| Behr Premium Cabinet, Door & Trim Enamel | Water-based cabinet/trim enamel | DIYers shopping at a home center | Convenient availability; verify the exact formulation and instructions on the can. |
| General Finishes Milk Paint | Water-based furniture/cabinet coating | Furniture-style cabinet updates and decorative projects | Easy to apply, but do not assume it behaves identically to a dedicated hard-wearing trim enamel. |
| Sherwin-Williams Gallery Series | Professional waterborne cabinet coating | Experienced spray finishers | A specialist spray system, not the simplest choice for a first-time brush-and-roller project. |
How these picks were chosen: This is an editorial comparison based on manufacturer descriptions, application requirements, and the practical needs of DIY homeowners. It is not a claim that all six paints were independently laboratory-tested or that one brand wins every scratch or adhesion test. Product lines and formulas can change; confirm the exact product and finish before buying.
1. Sherwin-Williams Emerald Urethane Trim Enamel: Best All-Around Choice
Emerald Urethane Trim Enamel is designed for cabinets, doors, and trim—surfaces that need more resistance to routine handling than standard wall paint. Sherwin-Williams describes it as a water-based coating that produces a hard finish and resists yellowing compared with conventional oil-based coatings.
It is especially appealing when you want one product for cabinet doors, drawer fronts, and painted trim. A smooth result is possible with a quality synthetic brush, a fine-finish roller, or properly configured spray equipment.
Why choose it:
- Formulated for high-contact surfaces rather than ordinary walls.
- Suitable for both light and dark cabinet colors.
- Offers a good balance of leveling, cleanability, and durability.
- Soap-and-water cleanup makes it more approachable than many traditional solvent-based enamels.
Trade-offs: Its premium positioning may mean a higher price than home-center paints. Dark colors, heavy coats, and poor airflow can all extend the time before a finish is ready for normal handling. Confirm current product-specific dry and recoat times, particularly because manufacturers update formulas.
Best for: A busy family kitchen where durability matters more than saving the last few dollars on a gallon.
2. Benjamin Moore Advance: Best for a Smooth Brush-and-Roller Finish
Advance uses waterborne alkyd technology. That gives it some of the flow and leveling characteristics associated with traditional alkyd paint while allowing water cleanup.
The extended open time is helpful when brushing door profiles: the coating has time to settle before it sets. This does not make brush strokes disappear automatically; a thin coat, minimal overworking, and a good brush still make a difference.
Benjamin Moore lists a 16-hour recoat time for Advance Satin under its specified conditions. That is a real planning consideration when painting multiple coats on both sides of many doors. The product may feel dry before its film has developed full hardness.
Why choose it:
- Particularly attractive for homeowners applying paint by hand.
- Can produce a refined finish on detailed door profiles.
- Available in cabinet-friendly satin and semi-gloss finishes.
- Water cleanup and a wide selection of tinted colors.
Trade-offs: The long recoat window slows the project. Waterborne alkyds can also show some yellowing over time, especially in poorly lit areas, although typically less than conventional oil-based alkyds. Do not promise that any white alkyd will stay perfectly unchanged forever.
Best for: A DIYer who prioritizes an even-looking painted surface and can work over several days.
3. INSL-X Cabinet Coat: Best for a Specialized Cabinet Enamel
INSL-X Cabinet Coat is made for cabinetry, doors, shelving, and trim. Its appeal is the combination of flow, adhesion, and a washable finished surface.
Cabinet Coat is often discussed as an option for previously coated cabinets. That does not mean every glossy or contaminated surface can be painted without preparation. Grease, wax, silicone polish, peeling paint, and damaged laminate can defeat even a strong bonding coating.
Why choose it:
- Specifically positioned for cabinets and other hard-use interior woodwork.
- Useful when a cabinet-focused enamel is preferable to a general-purpose wall paint.
- A reasonable option to sample on a sound, previously finished door.
Trade-offs: Some substrates still need deglossing or a compatible primer. Always inspect the current technical data sheet rather than relying on broad “no primer” claims found online.
Best for: Sound existing cabinets when the specific surface and preparation instructions match your project.
4. Behr Premium Cabinet, Door & Trim Enamel: Best Convenient Home-Center Option
Behr’s cabinet, door, and trim line is worth considering if you prefer to buy paint and supplies from the same home-improvement store. A cabinet-oriented enamel is a more sensible starting point than ordinary interior wall latex.
For a budget-conscious project, the better comparison is the total system cost—cleaner, filler, abrasives, primer, tools, and the likely number of coats—not simply the sticker price per gallon.
Why choose it:
- Convenient for DIY shopping and color selection.
- Designed for cabinets and trim rather than solely for walls.
- Can be applied with common DIY painting tools when the product instructions permit.
Trade-offs: Behr sells several similarly named coatings. Check that the can specifically identifies the cabinet/door/trim product you intend to use. Do not transfer dry-time, primer, or application claims from another Behr enamel to this one.
Best for: Homeowners seeking an accessible cabinet coating without shopping through a specialty paint dealer.
5. General Finishes Milk Paint: Best for Furniture-Style Projects
Despite the name, General Finishes Milk Paint is a modern water-based coating, not traditional powdered milk paint. It is popular for furniture and painted cabinetry because it is accessible to brush-and-roller users and comes in decorative colors.
It may be a good fit for a low- to moderate-use cabinet project or a coordinated kitchen hutch. However, the demands on a frequently opened kitchen drawer may be greater than those on a decorative piece of furniture.
Best for: Furniture-like cabinetry where color and ease of application are priorities. Check the current General Finishes recommendations for preparation, topcoats, and service conditions before treating it as interchangeable with a cabinet enamel.
6. Sherwin-Williams Gallery Series: Best for Experienced Spray Finishers
Gallery Series belongs in a different category from traditional DIY brush-and-roller paints. It is a professional cabinet coating intended for spray application and controlled finishing work.
A skilled painter with the right sprayer, ventilation, masking, and drying setup may choose this type of system to achieve a uniform appearance across many doors. But a professional-only application process is not automatically better for a homeowner painting in an occupied kitchen.
Best for: Contractors or experienced spray finishers who can follow the complete specified system. For a beginner using a brush and roller, Emerald Urethane or Advance is generally the more practical starting point.
What Type of Paint Works Best on Cabinets?
The most useful distinction is not simply “latex versus oil.” Look at the coating’s resin system and whether the manufacturer recommends it for cabinetry.
Waterborne alkyd and urethane-modified alkyd enamels
These combine water cleanup with leveling and film properties aimed at woodwork. They are often a strong choice for kitchen cabinets. Benjamin Moore Advance and Sherwin-Williams Emerald Urethane Trim Enamel are examples, though their formulas and drying characteristics differ.
Water-based acrylic and urethane-acrylic enamels
Cabinet-grade acrylic systems can offer good color retention and convenient cleanup. They may be especially useful where compatibility with an existing coating is favorable. The word acrylic alone, however, does not guarantee cabinet-level durability: an ordinary acrylic wall paint is not the same as a dedicated cabinet enamel.
Traditional oil-based paint
Solvent-based alkyd enamels can cure to a durable finish, but they bring odor, cleanup, ventilation, potential yellowing, and local availability considerations. For many occupied American homes, modern waterborne cabinet enamels are the simpler choice.
Two-component professional coatings
Some professional cabinet shops use catalyzed or two-component (2K) systems. These may offer excellent performance under their intended conditions but demand exact mixing, equipment, personal protection, and ventilation. Certain sprayed two-component coatings contain hazardous isocyanates. Do not treat 2K spraying as a casual indoor DIY upgrade; consult the safety data sheet and use appropriately trained professionals and controls.
Satin or Semi-Gloss: Which Finish Should You Choose?
For most kitchens, satin is the safest visual recommendation. It has enough sheen to look intentionally finished while tending to disguise minor dents, wood grain, and small application marks better than a shinier finish.
Choose semi-gloss if you prefer a brighter, more reflective appearance and are comfortable with its tendency to highlight imperfections. Both can be cleaned when the coating is fully cured and the manufacturer permits the cleaning method.
Avoid assuming the glossiest paint is automatically the most durable. Film chemistry, prep, coat thickness, and curing matter more than sheen alone. Very matte finishes may also make greasy fingerprints more noticeable or harder to remove, depending on the specific product.
Match the Paint and Primer to Your Cabinet Material
A coating that works well on solid maple may fail on a slick laminate door if the surface is not properly prepared.
| Cabinet surface | What to check before painting | Practical approach |
|---|---|---|
| Bare wood | Tannins, knots, grain, and porosity | Fill defects, sand appropriately, then use a compatible primer; stain-blocking may be needed. |
| Previously stained or varnished wood | Gloss, grease, wax, and soundness of old finish | Clean, dull the surface as permitted, test adhesion, and prime where recommended. |
| Previously painted wood | Peeling, old coating type, and adhesion | Remove loose material, feather edges, clean, and use a compatible bonding primer if required. |
| MDF | Swollen edges, exposed fibers, and moisture damage | Seal vulnerable edges carefully and avoid over-wetting; badly swollen MDF may need replacement. |
| Laminate or melamine | Slick surface and whether the substrate is paintable | Verify manufacturer compatibility, use the specified bonding system, and test a concealed area. |
| Thermofoil | Lifting or peeling vinyl film | Paint is not a reliable fix for failing thermofoil; consider repair, new doors, or professional refinishing. |
An adhesion test is worth the time. Prepare and coat a small inconspicuous area exactly as planned. Let it develop adequate hardness according to the coating instructions, then assess whether it is firmly attached before committing to the entire kitchen. A same-day scratch test is not a reliable test of full-cure durability.
Do You Need to Sand Kitchen Cabinets Before Painting?
Usually you need to clean thoroughly and create an appropriate bonding surface, but that does not mean stripping every cabinet to bare wood. Sound existing finishes often need only controlled deglossing or scuff sanding, provided the coating and primer system allows it.
“No-sanding cabinet paint” claims often leave out important qualifications. A coating may adhere to one well-prepared varnish yet fail on silicone-contaminated doors or damaged laminate. Follow the specific product’s directions instead of a blanket shortcut.
Lead-paint safety: If your home was built before 1978, existing painted surfaces may contain lead. Sanding or scraping can create hazardous dust. Before disturbing old coatings, consult the EPA’s lead-safe renovation guidance and use lead-safe practices or a qualified professional. Do not dry-sand suspected lead paint.
How to Paint Kitchen Cabinets for a Lasting Finish
Good cabinet painting is more about control than speed. A straightforward workflow for a sound, paintable surface looks like this:
- Remove and label components. Take off doors, drawer fronts, knobs, and hinges where practical. Number each door and mark hinge locations so everything returns to the right opening.
- Clean off cooking residue. Use a cleaner compatible with your existing finish and follow its rinse instructions. Give extra attention to the areas beside handles and above the stove. Let everything dry.
- Inspect and repair. Fix loose joints, fill nail holes and dents, and address peeling or moisture damage. Paint will not stabilize a failing cabinet substrate.
- Dull the surface where required. After checking lead safety and product instructions, scuff or degloss sound glossy coatings as appropriate. Remove all dust with a suitable vacuum and clean cloth.
- Prime according to the substrate. Use a bonding primer for hard-to-adhere surfaces or a stain-blocking primer for wood that may bleed through light colors. Confirm compatibility with the selected topcoat.
- Apply thin, even paint coats. Use a fine-finish roller on flat sections and a quality brush in profiles, working with the paint’s recommended wet-film thickness. Avoid repeatedly brushing an area that has started to set.
- Observe the stated recoat interval. The clock starts under the specified temperature and humidity conditions. Cooler, damp rooms may require extra time.
- Allow adequate curing before heavy use. Rehang gently when the finish can tolerate handling; avoid slamming doors, stacking freshly painted faces, or scrubbing new paint. Follow the manufacturer’s guidance for return to service.
Brush, roller, or sprayer?
Brush and roller: The most approachable DIY combination. Choose a high-quality synthetic angled brush for edges and a smooth-surface roller designed for fine finishes. Work in thin coats and remove drips from panel corners immediately.
Sprayer: Can produce a more uniform surface, especially on flat door faces, but requires masking, practice, and correct equipment settings. Spraying in an occupied home also adds overspray and inhalation concerns. Follow the coating safety data sheet; adequate ventilation and correctly selected respiratory protection are essential.
A helpful practice run: Paint the back of one spare or less-visible door first. Look at it in angled daylight. If brush ridges, sags, or roller stipple are obvious, adjust your method before doing the whole kitchen.
How Long Does Cabinet Paint Take to Dry and Cure?
These terms are not interchangeable:
- Dry to touch: The surface no longer feels wet under the stated conditions.
- Ready to recoat: Enough time has passed for another coat without compromising the system.
- Ready for light handling: The door may be movable or installable if handled carefully.
- Cured or developed hardness: The finish has progressed toward its intended wear resistance, which can take much longer.
For example, Benjamin Moore lists a 16-hour recoat interval for Advance Satin. That does not mean the coating is fully hardened after 16 hours. Humidity, poor airflow, coat thickness, and temperature can all slow drying and cure.
Plan for a kitchen that remains usable in stages. Keep painted doors separated while they dry, avoid adhesive bumpers until the coating can tolerate them, and wait before aggressive cleaning or reinstalling hardware under pressure.
How Much Paint Do You Need?
Cabinet paint quantities depend on the number and size of doors, exposed cabinet frames, whether you coat door backs, and how many coats are needed. A manufacturer’s square-foot coverage number describes a coat over a surface under specified conditions—not the floor area of your kitchen.
For a practical estimate:
- Measure the height and width of each door and drawer front in feet.
- Multiply height by width, then count both faces if painting both sides.
- Add exposed frames, end panels, and other painted areas.
- Multiply total surface area by the planned number of coats.
- Divide by the paint’s listed coverage per gallon, then allow a sensible margin for edges, detailed profiles, and application losses.
For example, if the actual paintable area is 100 square feet and you plan two coats, that is 200 square feet of coating coverage before waste. At a hypothetical 400 square feet per gallon, the arithmetic suggests half a gallon, but real projects can require more because of small surfaces, roller or sprayer losses, and touch-ups. Purchase based on the exact product’s coverage and packaging sizes.
Common Cabinet Painting Mistakes to Avoid
Painting over grease. Even excellent enamel cannot reliably bond to accumulated cooking oils. Clean before sanding so you do not work contamination into the surface.
Skipping the substrate check. Laminate, failing thermofoil, and moisture-damaged MDF need different decisions than sound hardwood doors.
Using regular wall paint. Wall paint is optimized for different wear patterns. Select a product explicitly intended for cabinetry, doors, or trim.
Applying thick coats to finish faster. Heavy coats can sag, stay soft longer, or create sticking at the door-frame contact points.
Rehanging too soon. A surface that feels dry may still mark, block, or chip under hinge pressure and repeated handling.
Ignoring test patches. A successful sample can reveal adhesion problems or an unwanted sheen before the entire kitchen is committed.
Assuming a clear topcoat is mandatory. Many cabinet enamels are designed as standalone finish coats. An incompatible clear coat can alter color or create adhesion problems; add one only if the coating manufacturer approves the system.
Frequently Asked Questions
What is the most durable paint for kitchen cabinets?
A cabinet-specific urethane-modified alkyd or other high-performance enamel is a sensible starting point for a heavily used kitchen. Sherwin-Williams Emerald Urethane Trim Enamel is a strong candidate, but real durability also depends on substrate, primer, application, and cure. No single paint can be declared the most durable for every situation without controlled comparative testing.
Is Benjamin Moore Advance or Sherwin-Williams Emerald better?
Choose Advance if you especially value flow and leveling with a brush or roller and can accommodate its longer recoat time. Consider Emerald Urethane for an all-around hard-wearing cabinet finish. Both require careful preparation, and neither eliminates the need for a compatible primer where the substrate calls for one.
Can you paint cabinets without primer?
Sometimes a manufacturer allows direct application over a particular sound, properly prepared coating. However, bare wood, stain-prone wood, slick laminate, or questionable existing finishes often benefit from—or require—a specific primer. Verify the current directions for both the cabinet surface and the topcoat.
Is satin or semi-gloss better for kitchen cabinets?
Satin is a versatile choice for most kitchens because it gives a gentle sheen and makes minor surface flaws less obvious. Semi-gloss creates a shinier look but shows preparation imperfections more readily. Compare actual coated samples under your kitchen lighting.
Can I use regular latex wall paint on cabinets?
It is possible to apply it, but it is usually not the best long-term choice for doors and drawers that are touched, rubbed, and cleaned frequently. Use a coating intended for cabinets or hard-use trim instead.
What paint is best for oak kitchen cabinets?
A quality cabinet enamel such as Emerald Urethane or Advance can work well on sound oak. The bigger decision is whether you want to see the natural open grain. If you prefer a smooth, filled look, use a suitable grain filler and compatible primer; paint alone will not make deep oak grain vanish.
How do I stop painted cabinet doors from sticking?
Remove excess paint from edges, follow the recommended recoat times, and allow the finish to harden before returning doors to full service. Verify the coating’s blocking resistance and avoid closing freshly painted surfaces tightly against one another. Do not use waxes or additives unless the manufacturer explicitly permits them.
Are expensive cabinet paints worth it?
Often they are worth considering because cabinet doors demand good adhesion, flow, and resistance to handling. But a premium enamel over grease or a poorly bonded old finish can still fail. Spend on proper cleaning, compatible primer, and enough time for curing before assuming the highest-priced can solves everything.
Final Recommendation
For a typical DIY cabinet repaint, start by comparing Sherwin-Williams Emerald Urethane Trim Enamel and Benjamin Moore Advance. Emerald is a strong general-purpose choice for hardworking kitchen cabinetry; Advance is particularly attractive when you are brushing or rolling and can wait longer between coats. INSL-X Cabinet Coat and Behr’s dedicated cabinet enamel are worth a look when availability, surface compatibility, or budget changes the decision.
Whichever you choose, prepare one test door, follow the latest manufacturer instructions, and give the coating time to develop hardness. A careful paint system on sound cabinets will matter far more than a brand name alone.