Garage Door Insulation: Best Materials, Costs, and How to Install It Safely
A thin, uninsulated garage door can turn the garage into an oven on a sunny afternoon or leave it nearly as cold as the outdoors in winter. Adding insulation can slow that heat transfer, make a workshop more comfortable, and sometimes reduce noise. But the improvement depends on the door, the climate, and how well the rest of the garage is sealed.
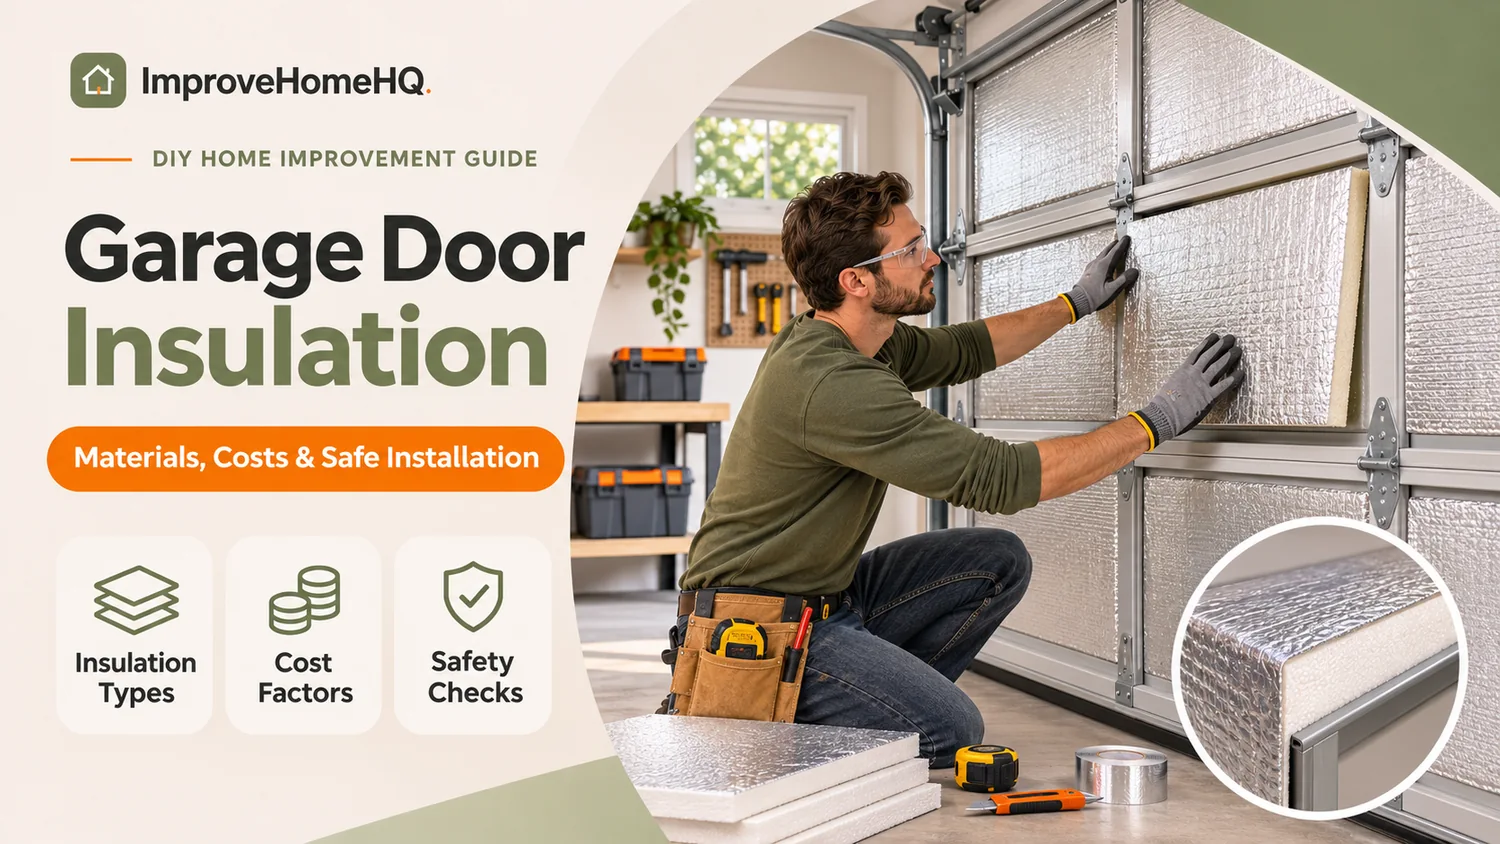
For many uninsulated sectional steel doors, the simplest retrofit is a compatible rigid foam or vinyl-faced fiberglass kit. First confirm that the door manufacturer permits the added material and weight. Then measure each panel, install the kit as directed, and check the door’s balance and safety systems. Do not adjust the springs yourself.
This guide covers the materials worth considering, realistic costs, thermal ratings, and the installation details that matter most.
Is Insulating a Garage Door Worth It?
It often is if you use your garage as a workshop, gym, or hobby space, or if a large metal door receives direct afternoon sunlight. Insulation also makes sense when the garage is heated or cooled. A detached garage used only for parking may not benefit enough to justify the expense.
| Your situation | Likely value | Where to start |
|---|---|---|
| Uninsulated steel door on an attached garage | Often worthwhile | Check door compatibility and perimeter seals |
| Garage used for work or exercise | Often worthwhile | Combine a suitable door kit with broader air sealing |
| Heated or cooled garage | Potentially significant | Assess the entire insulated enclosure, including ceiling and walls |
| Detached garage used mainly for parking | Depends on comfort needs | Fix drafts and damaged seals first |
| Door already factory-insulated | Additional panels may be unnecessary | Repair seals or damaged components |
| Door is damaged, heavy, or poorly balanced | Don’t retrofit yet | Get a professional inspection |
What changes can you expect?
Insulation reduces heat flow through the panels. In summer, it can limit heat entering through a sun-warmed door; in winter, it can slow heat loss. Some products also dampen panel vibration, which can make the door quieter.
It does not produce heating or cooling, eliminate every draft, or guarantee a specific temperature drop. A garage with an uninsulated roof, large gaps at the door edges, or open vents may still track outdoor conditions. Be skeptical of universal claims such as “your garage will be 20 degrees cooler” unless they’re backed by tests under conditions similar to yours.
For an attached garage, air-sealing the surfaces between the garage and living space is particularly important. The U.S. Department of Energy’s air-sealing guidance distinguishes insulation, which slows heat transfer, from air sealing, which reduces unwanted airflow. Garage-to-house gaps also matter for keeping vehicle fumes and other pollutants out of living areas.
Choosing the Best Insulation Material
The main retrofit options are rigid foam boards, faced fiberglass, and reflective products. Factory-insulated doors commonly use polystyrene or polyurethane inside a built-in panel assembly. These aren’t interchangeable: the door’s shape, usable cavity depth, hardware, and allowable weight determine what can be installed safely.
| Material | Why homeowners choose it | Main limitation | Best fit |
|---|---|---|---|
| Rigid expanded polystyrene (EPS) | Lightweight, neat-looking panels, relatively simple cutting | Poor fitting can cause rattling or loose panels | Straightforward steel-door retrofits |
| Other compatible rigid foam boards | Thermal resistance in a thin, firm panel | Not every construction foam is approved for exposed door use | Doors with approved attachment systems |
| Vinyl-faced fiberglass kit | Flexible material; may dampen noise | Needs secure clips and careful handling | Compatible panel cavities with a kit-specific system |
| Reflective foil-faced kit | Lightweight; can address radiant heat in suitable assemblies | Radiant performance depends on an adjacent air space | Manufacturer-tested, sun-exposed applications |
| Factory polyurethane or polystyrene | Integrated insulation in a purpose-built door | Requires replacing the door | Major door upgrades |
Rigid foam: a practical starting point
Expanded polystyrene (EPS) is commonly sold in pre-cut garage door insulation kits. It is easy to handle and can look tidy when fitted inside steel panel cavities. Some kits use a laminated or textured facing for durability.
Other foam boards, including extruded polystyrene (XPS), may have different thermal characteristics, but don’t buy generic foam board solely by thickness or R-value. Confirm that the door and foam manufacturers approve the product, its exposed facing, and the attachment method. Foam plastics have fire-performance considerations, and local requirements can vary.
Choose a kit with the correct panel dimensions, a specified installation method, and manageable total weight. An overly tight friction fit can deform panels; an overly loose fit can fall out as the door moves.
Fiberglass: flexible but needs proper retention
Garage-door-specific fiberglass kits typically include a protective vinyl facing and clips or other retention hardware. They conform more easily to certain panel shapes and may reduce some noise.
Use a faced kit intended for moving garage doors, not loose household wall batts. Follow instructions for cutting and compressing the insulation, and use the manufacturer-recommended gloves, eye protection, and respiratory protection when needed. Never let fibers or facing hang into hinges or tracks.
Reflective foil: understand the air-gap requirement
Reflective foil can reduce radiant heat transfer, but its shiny surface is not equivalent to a thick layer of conventional insulation. A radiant barrier needs an adjacent air space to work as intended. If a reflective face is pressed directly against another solid material, the installation may not deliver the advertised radiant benefit.
Check whether a product’s stated R-value is for the material itself or a complete tested assembly with a particular air gap. The Department of Energy’s insulation guidance explains how thermal resistance and radiant barriers differ. Don’t build improvised layers of foil, foam, and fiberglass unless their combined installation is approved.
Polyurethane versus polystyrene in new garage doors
If you’re buying a replacement door, consider its factory insulation rather than trying to imitate that construction at home. Manufacturers such as Clopay use polystyrene boards in some models and injected polyurethane in others. Polyurethane can fill cavities and bond to the door skins, contributing to a rigid multilayer assembly.
A new door’s tested whole-door performance, seals, construction, wind-load rating, and warranty matter more than comparing foam names alone.
R-Value vs. U-Factor: What the Numbers Really Mean
R-value measures resistance to heat flow. Higher is better when you’re comparing insulation materials under equivalent test conditions. For example, an insulation layer labeled R-8 resists more heat flow than one labeled R-4.
But a kit’s R-value is not automatically the R-value of the finished garage door. Metal framing, hinges, panel joints, uninsulated edges, and windows can create paths for heat transfer.
U-factor measures heat passing through an assembly. Lower is better. When comparing complete new doors, look for a whole-door U-factor measured under a recognized test method rather than assuming that an advertised foam R-value describes the finished door.
The Door & Access Systems Manufacturers Association (DASMA) lists ANSI/DASMA 105-2017, a method for testing garage-door thermal transmittance and air infiltration. This helps explain why two doors with similar insulation layers can perform differently as complete products.
For a retrofit, compare verified kit ratings, installation requirements, thickness, and weight. For a replacement, request tested whole-door data when available.
How Much Does a Garage Door Insulation Kit Cost?
Kit prices vary widely by material and brand. For a grounded shopping reference, The Home Depot’s U.S. listings checked in November 2026 showed these examples:
| Example eight-panel kit | Listed price at research time | Important detail |
|---|---|---|
| Cellofoam EPS kit | About $63 | Lightweight rigid foam |
| Reflective/white panel kit | About 139–149 | Check installation and radiant-performance requirements |
| Owens Corning vinyl-faced fiberglass kit | About $184 | Eight faced fiberglass panels; listed R-8 |
These are retail examples, not national averages or fixed quotes. Prices, stock, discounts, and coverage change by location and date. The eight-panel label doesn’t mean that every kit fits every single-car garage door.
Budget separately for weather seals, replacement clips, tools, and any professional inspection or balancing required. If your door needs two kits, multiply the relevant material cost; if its spring system requires service, the actual project cost will be higher.
How many panels do you need?
Count the recessed cavities and measure their clear width, height, and depth. A nominal 9-foot-by-7-foot door has a face area of 63 square feet, but its insulated area will be smaller because frames, hinges, and other components occupy space. Panel dimensions and cavity count are more useful than total door area.
For example, if your door has four sections with two eligible cavities each, that gives eight cavities—but verify the kit’s individual panel dimensions before buying.
Will it pay for itself?
There’s no credible universal payback period. A heated garage in a cold climate might benefit more than an unheated detached garage. Utility savings also depend on air leakage and how the garage connects to conditioned rooms. Treat improved comfort as a likely objective and energy savings as situation-dependent.
Also, don’t assume a current federal tax credit will cover the purchase. The IRS states that the Energy Efficient Home Improvement Credit does not apply to property placed in service after December 31, 2025. Local utility incentives, if any, need separate verification.
Before You Start: Check Door Safety and Compatibility
The most important installation question is not how to cut the foam; it’s whether your door can safely carry it. Garage doors are balanced by spring systems designed around a specific door weight. An electric opener is not a substitute for a correctly balanced door.
DASMA Technical Data Sheet 176, Adding Weight to a Garage Door Assembly, warns against attaching materials without explicit instructions from the original door manufacturer. Added weight can affect the entire door system, including springs, tracks, rollers, and fasteners.
Before buying or installing anything:
- Identify the door manufacturer and model if possible. Check the manual or ask the manufacturer whether a retrofit kit is permitted.
- Inspect for damaged panels, frayed cables, loose hardware, broken weather seals, corrosion, or uneven movement.
- Check the kit’s total added weight, not just the weight of one panel. Ask the door manufacturer or a qualified garage-door technician whether an assessment is needed.
- Do not modify or loosen torsion springs, extension springs, lift cables, drums, or bottom brackets. These parts can hold dangerous tension.
- If the door is already difficult to move, visibly damaged, or unbalanced, arrange professional service before insulating.
If the door manufacturer prohibits the retrofit, skip it. A replacement insulated door may be safer and more sensible.
How to Insulate a Garage Door: Step by Step
The procedure below is a general overview for manufacturer-approved kits on suitable sectional steel doors. Follow the instructions shipped with your particular product whenever they differ.
Tools and materials
You will usually need a tape measure, pencil or marker, straightedge, utility knife, cutting surface, cleaning cloths, safety glasses, gloves, and the compatible insulation kit. A small stepladder and manufacturer-specified respirator may also be necessary. Use only the included or approved clips, tape, or adhesive.
Step 1: Close, inspect, and clean the door
Close the garage door and keep the work area clear. Follow the door and opener manuals for preventing accidental movement while you work. Never reach into spring or cable assemblies.
Clean the inside faces of the panels using a cleaner suitable for the door finish. Remove dust, oil, and residue; let the surfaces dry thoroughly. Adhesive clip bases may fail when applied to dirty or damp metal.
Check for water intrusion and rust. Fix those problems before covering them with insulation.
Step 2: Measure each individual cavity
Measure the usable interior recess, not just the full section width. Record the clear height, width, and depth of each cavity. Top and bottom sections may differ from the center sections, even on a symmetrical-looking door.
Mark hinges, struts, windows, lift cables, rollers, and other areas that must remain uncovered. Do not assume that insulation can bridge the gaps between moving sections.
If the kit has prefabricated panels, compare your measurements to its stated fit range before cutting.
Step 3: Mark and cut the insulation
Transfer each measurement to the panel and cut on a protected work surface. Use a straightedge for clean edges. For rigid foam, follow the product’s instructions on clearance or friction-fit allowance; forcing oversized foam into a metal cavity can bow or stress the panel.
For faced fiberglass, protect your skin, eyes, and breathing as instructed and avoid excessive compression. Never cut insulation while it’s resting across moving door hardware.
Step 4: Attach insulation using the approved system
Rigid foam: Fit each cut panel into its assigned recess using the specified retention method. Confirm that the panel is supported along its edges and cannot work loose during door movement.
Fiberglass: Install clip bases or retainers in the positions specified by the kit, then place the faced material and fasten it securely. The protective facing should remain intact and free of sagging.
Reflective systems: Observe the required orientation and air gap, if any. Do not tape reflective material indiscriminately across hinge lines or panel joints.
Avoid drilling into the door or applying construction adhesive unless the door and insulation manufacturers explicitly approve that method.
Step 5: Check every joint and moving part
Before operating the door, inspect the entire interior surface. Look for protruding corners, loose clips, sagging batts, and material that can touch hinges, rollers, tracks, or cables. Nothing should bridge joints between door sections.
Check that windows, handles, locking hardware, and reinforcing struts still work normally. An attractive-looking installation isn’t acceptable if it obstructs any part of the operating system.
Step 6: Have balance checked and test operation
Because the retrofit adds weight, follow the door manufacturer’s requirement for a balance inspection or professional adjustment. Never attempt spring adjustments yourself. If the door feels heavier, drops unexpectedly, binds, or the opener strains, stop operating it and call a qualified technician.
Once the door has been confirmed safe to operate, run a full open-and-close cycle while observing from a safe distance. Check that insulation remains secure and the opener’s photoelectric sensors and automatic reversal feature pass the tests described in its manual.
If a safety test fails, take the door out of normal use until it’s repaired.
Weatherstripping Can Matter as Much as the Panels
A garage door may have well-insulated panels and still admit substantial outdoor air through gaps. Inspect the bottom seal, side seals, and top seal before deciding the project is complete.
- Bottom seal: Look for cracks, flattened rubber, tears, or daylight between the door and floor. Buy a replacement profile that fits the existing retainer. Never loosen cable-bearing bottom brackets.
- Side and top seals: They should make appropriate contact with the closed door without binding or preventing movement. Repair damaged trim or seals.
- Section joints: Do not pack rigid foam or adhesive into articulated joints. If the door has failed factory joint seals, ask the manufacturer about compatible replacements.
On an attached garage, also check the wall and ceiling separating the garage from the house and the weatherstripped access door. Proper garage-to-house air sealing supports comfort and helps limit pollutant transfer; garage-door panel insulation alone doesn’t accomplish that.
Mistakes That Reduce Performance or Create Risk
Choosing the highest advertised R-value without checking fit. A high rating does little good if panels loosen or interfere with hinges. Compare verified performance and installed compatibility.
Adding too much weight. Spring and opener systems must remain matched to the full door weight. If a professional evaluation is required, include that cost in your decision.
Using thin foil as if it were thick foam. Radiant barriers have specific air-space requirements. Treat large performance claims cautiously when the installation conditions aren’t stated.
Using generic household insulation. Loose batts and exposed foam may not be suitable for a moving door. Select products approved for the particular application.
Ignoring moisture. Water behind new panels can hide corrosion or damage facing and adhesive. Resolve leaks and condensation issues first.
Insulating a failing door. Broken hardware, severe rust, or poor balance should be addressed before any retrofit. Sometimes replacement is better value.
Is a New Insulated Garage Door a Better Choice?
A retrofit can be a reasonable lower-cost improvement when the existing door is sound and the manufacturer allows it. It won’t recreate the structure of a factory-insulated sandwich door.
| Decision factor | Retrofit kit | New insulated door |
|---|---|---|
| Upfront expense | Usually lower | Usually higher |
| Existing door condition | Must be sound and compatible | Replaces worn or damaged sections |
| Thermal rating | Kit material rating; assembled result varies | Ask for tested whole-door performance |
| Appearance | Interior panels or facings remain visible | Finished assembly, depending on model |
| Weight and balance | Additional weight needs compatibility review | Engineered as a complete door system |
Choose a retrofit if the current door is mechanically healthy, the kit is approved, and your goal is moderate comfort improvement. Consider replacement if the door is old, damaged, noisy from mechanical wear, or unable to accommodate an insulation kit safely.
For a new door, compare whole-door U-factor, air leakage, thermal breaks, weather seals, wind resistance, warranty, and installed cost. In coastal or high-wind regions, local code and wind-load requirements can be more important than the insulation number alone.
Frequently Asked Questions
What is the best insulation for a garage door?
For many compatible uninsulated steel sectional doors, a rigid EPS foam kit is a practical choice. A faced fiberglass kit can also work well. Select based on the door manufacturer’s approval, material weight, panel fit, tested thermal rating, and secure attachment—not just product advertising.
Will insulation make my garage cooler in summer?
It can slow heat passing through sun-warmed door panels, but it won’t actively cool the garage. The roof, walls, air leaks, ventilation, and outdoor temperature still determine much of the indoor condition.
Will it keep an unheated garage warm in winter?
It will reduce heat transfer through the door, but it cannot supply heat. An unheated garage can still approach outdoor temperatures during sustained cold weather. Don’t rely on door insulation to prevent pipes from freezing.
Do I need R-8 or R-16 insulation?
There is no universal garage-door target. A higher material R-value reduces heat flow through that material, but the complete door’s construction also matters. If buying a new door, request whole-door U-factor data. For a retrofit, prioritize a compatible kit with accurate ratings.
Can I install garage door insulation myself?
Some manufacturer-approved kits are designed for DIY installation on suitable doors. Measuring, cutting, and securing panels may be manageable, but checking or adjusting high-tension spring systems is not a DIY task. Have a professional assess any balance or operating issue.
Can insulation damage my garage door opener?
Added weight may affect door balance and cause the opener to work against a poorly balanced door. The springs must properly counterbalance the door. Stop using a strained or binding system and get it checked professionally.
Is reflective insulation good for hot climates?
It may be useful if the system is tested for the relevant installation and has the necessary air space. Thin reflective material without the required gap should not be assumed to perform like substantial foam insulation.
Should I insulate a detached garage?
Only if the added comfort or temperature moderation is useful for how you use it. A detached garage used exclusively for parking might benefit more from repairing drafts and seals first.
Does insulation prevent condensation?
Not by itself. Humidity, cold surfaces, air leakage, and water intrusion can still cause moisture problems. Address leaks and moisture sources before covering steel panels.
Can I put spray foam inside my garage door?
Don’t spray foam into a moving garage door unless its manufacturer explicitly approves that treatment. Expansion, adhesion, added weight, and access to hardware can create problems. Factory-injected polyurethane is part of an engineered door, not the same as a DIY spray-foam retrofit.
The Bottom Line
A compatible insulation kit can make a useful difference to a bare metal garage door, especially when the garage is regularly occupied or exposed to strong sun and cold weather. Rigid foam offers a simple retrofit for many suitable doors; faced fiberglass is another option; reflective products require extra care with their installation claims.
Start with the door’s condition and manufacturer guidance, not the highest R-value on a box. Measure the cavities, check weatherstripping, account for added weight, and keep every moving component clear. If the door needs major repairs or cannot accept a retrofit safely, compare factory-insulated replacement models instead.
Meta description: Compare garage door insulation materials, prices, and R-values, plus learn safe DIY installation steps and when to replace your door.
Primary keyword: garage door insulation
Category: Doors & Windows
Last researched: November 2, 2026
Sources and further reading
- DASMA: Adding Weight to a Garage Door Assembly (Technical Data Sheet 176)
- DASMA: Industry Standards, including ANSI/DASMA 105
- U.S. Department of Energy: Consumer Guide to Air Sealing the Home
- U.S. Department of Energy: Insulation
- Clopay: How to Choose an Insulated Garage Door
- IRS: Updated Energy Credit Termination Dates